Guide to Building Water Damage Estimates in Restoration


Every water mitigation job begins with a story: where the water came from, how far it spread, and what’s needed to stop it from causing more harm. A water damage estimate captures that story in numbers, turning fieldwork into a document carriers can trust. When it’s accurate, approvals move faster, disputes fade, and projects stay on track from first call to final payment.
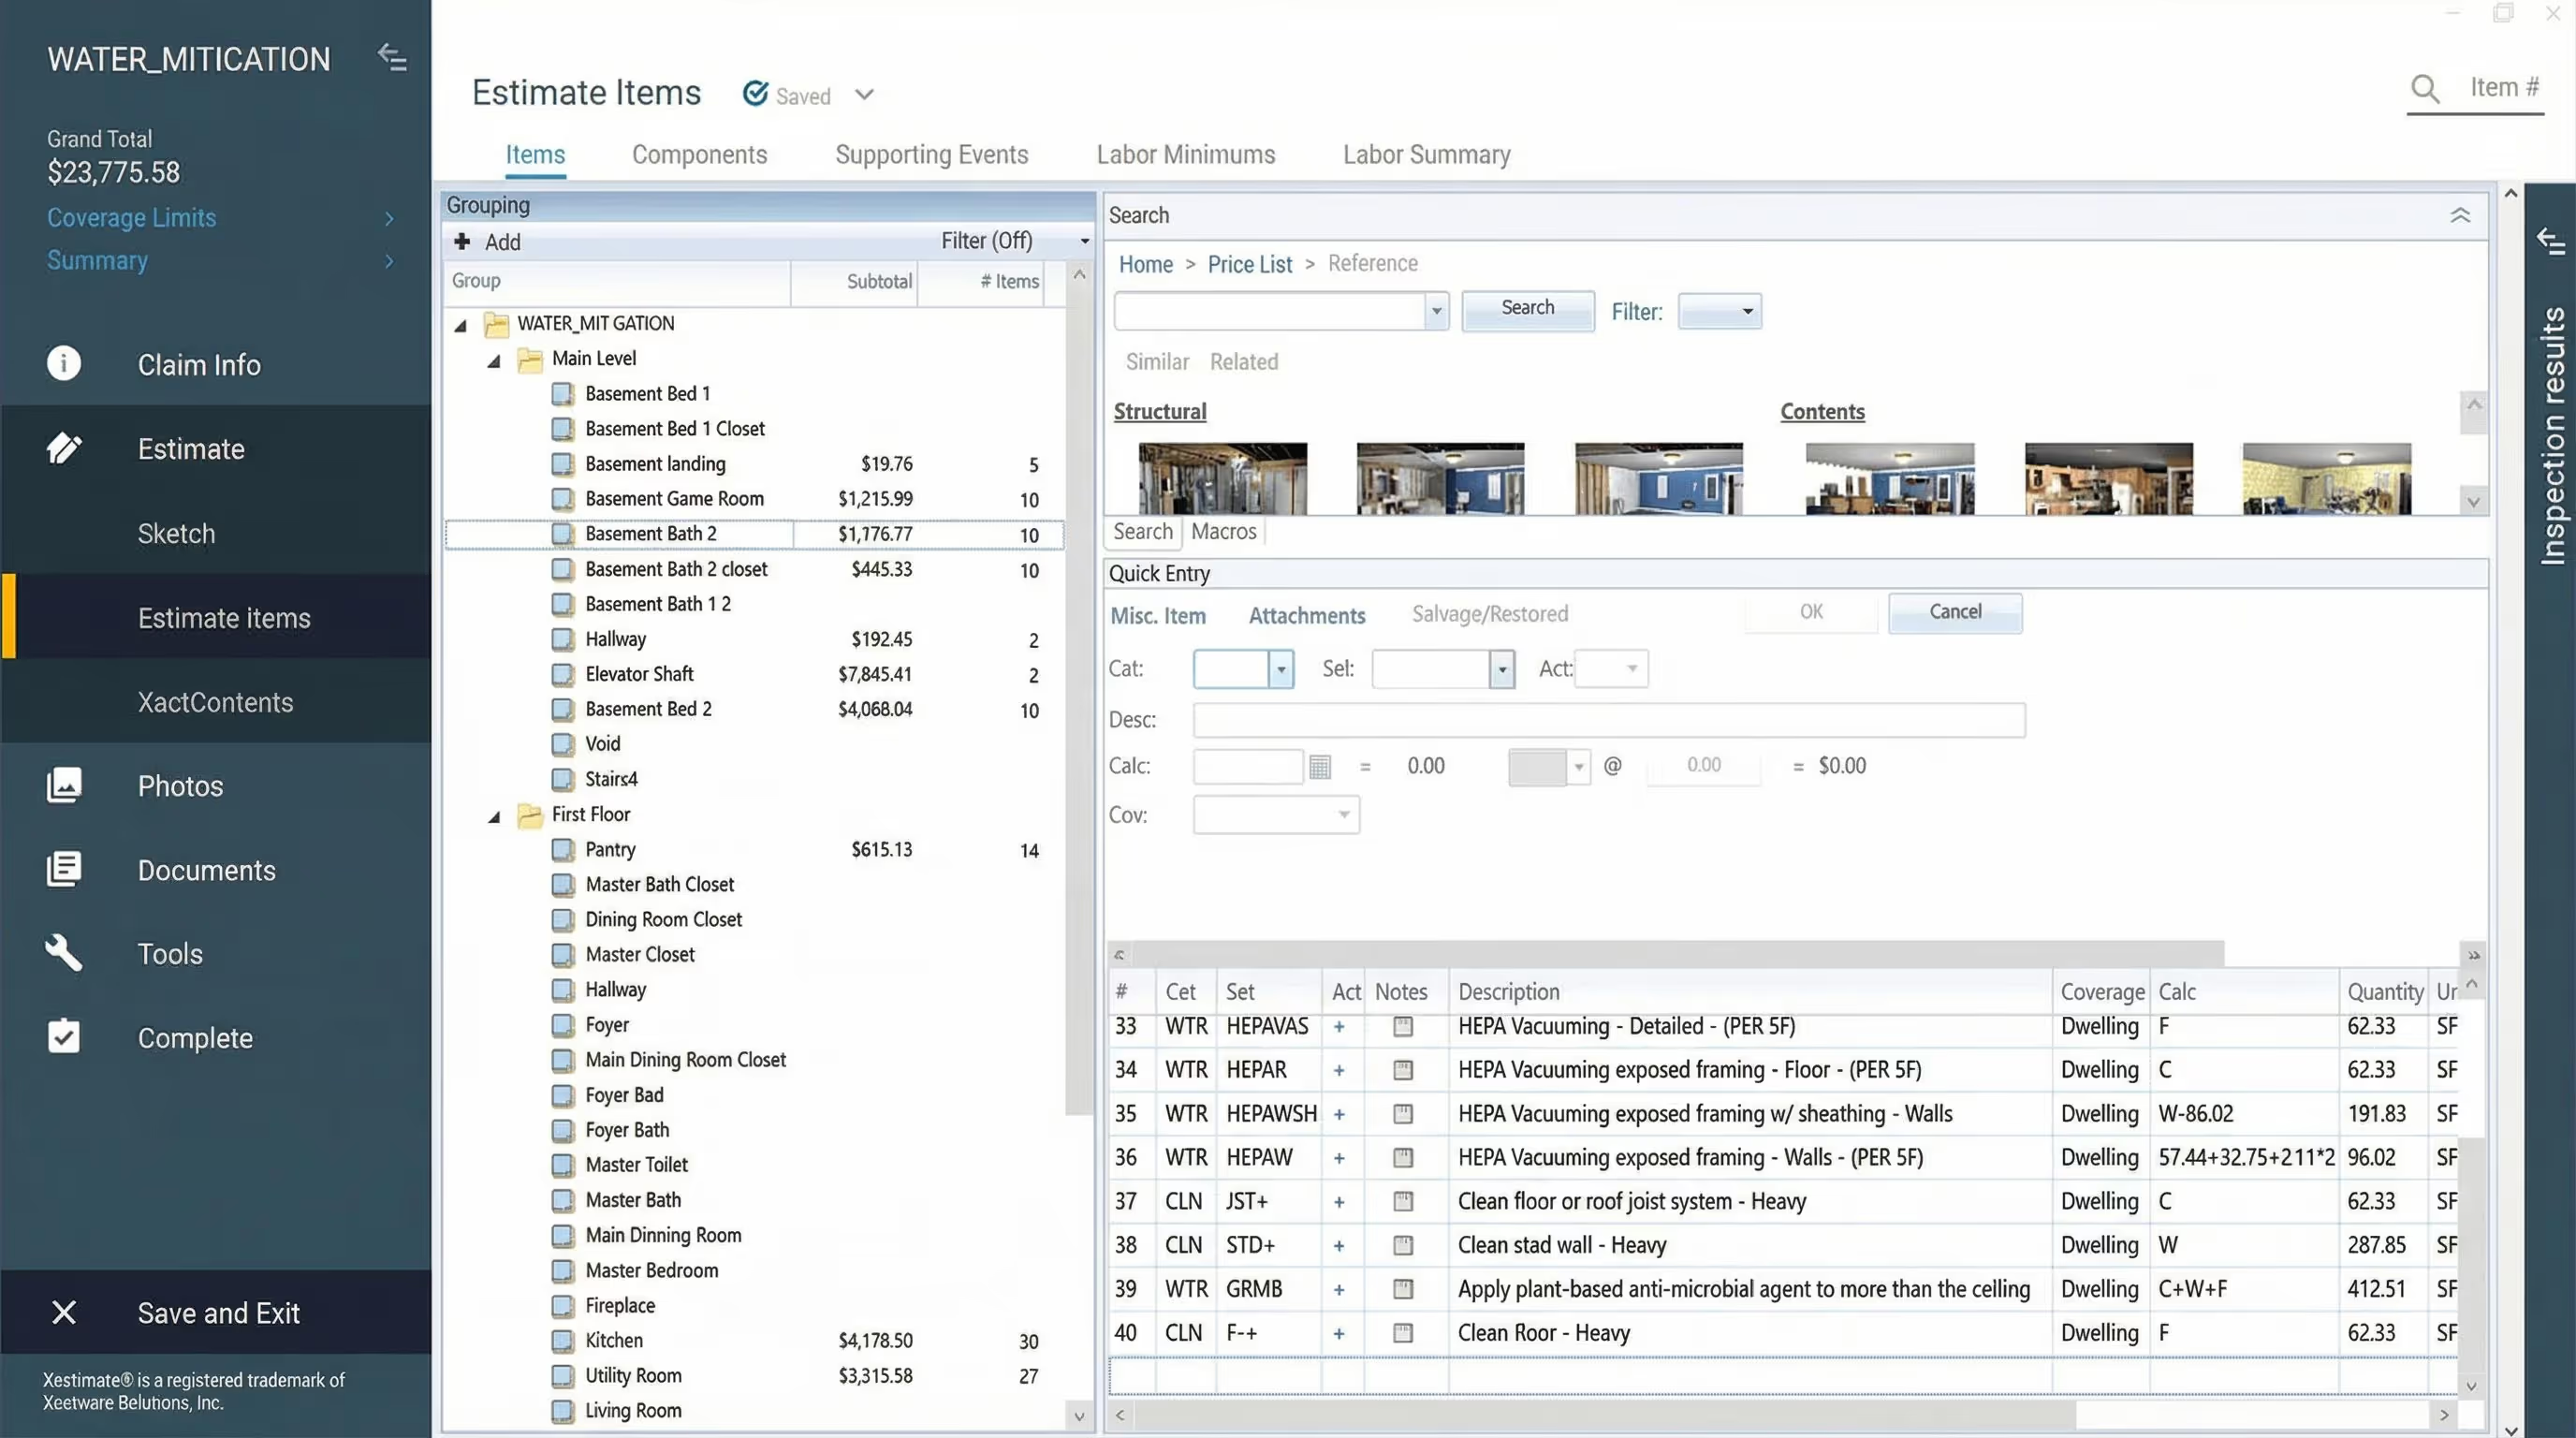
Example water damage estimate
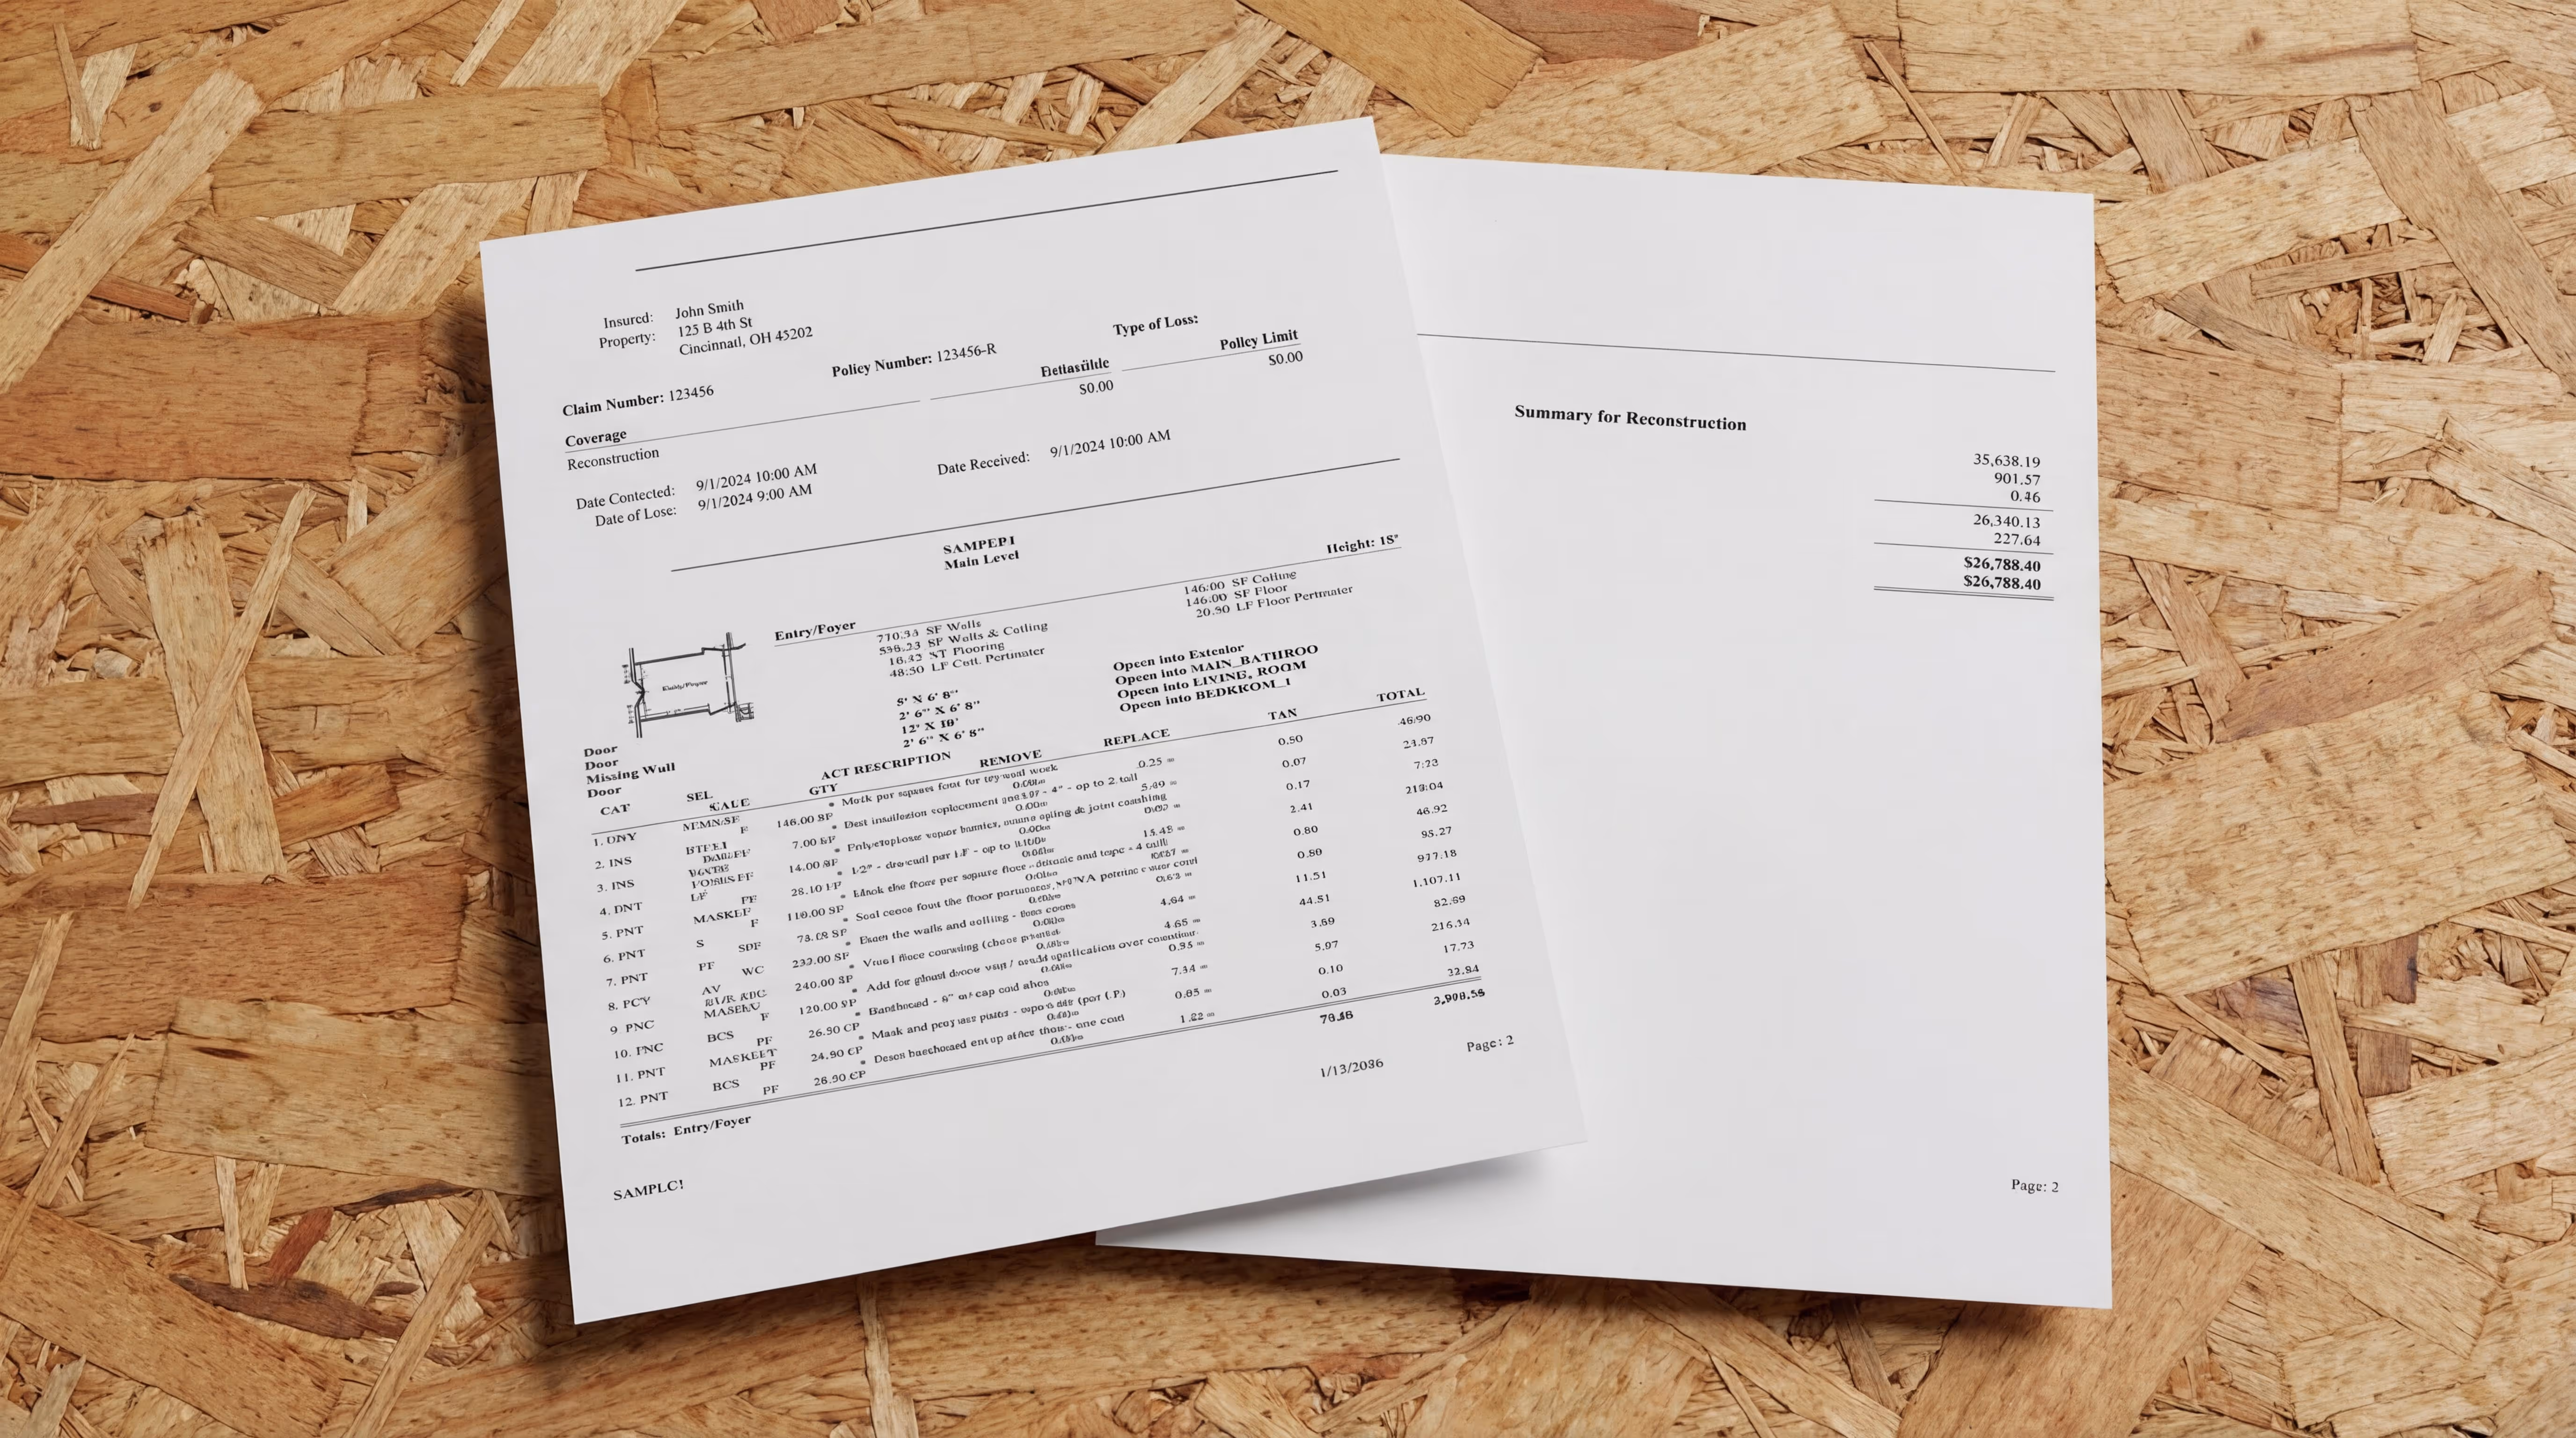
This is a sample water damage estimate created in Xactimate. It shows how clear visual documentation and accurate measurements translate into a complete, defensible scope for a four room, 1,621.19 SF (Walls and Ceiling) property.
Click here to download this example water damage estimate.
What Is a Water Damage Estimate?
A water damage estimate is a detailed assessment created for unscheduled, time-sensitive work performed to prevent active water damage from spreading.
Water mitigation is urgent work. Unlike renovation or reconstruction, homeowners can’t wait for quotes or scheduling. Every hour matters because the longer water sits, the more it spreads and the more contaminated it becomes.
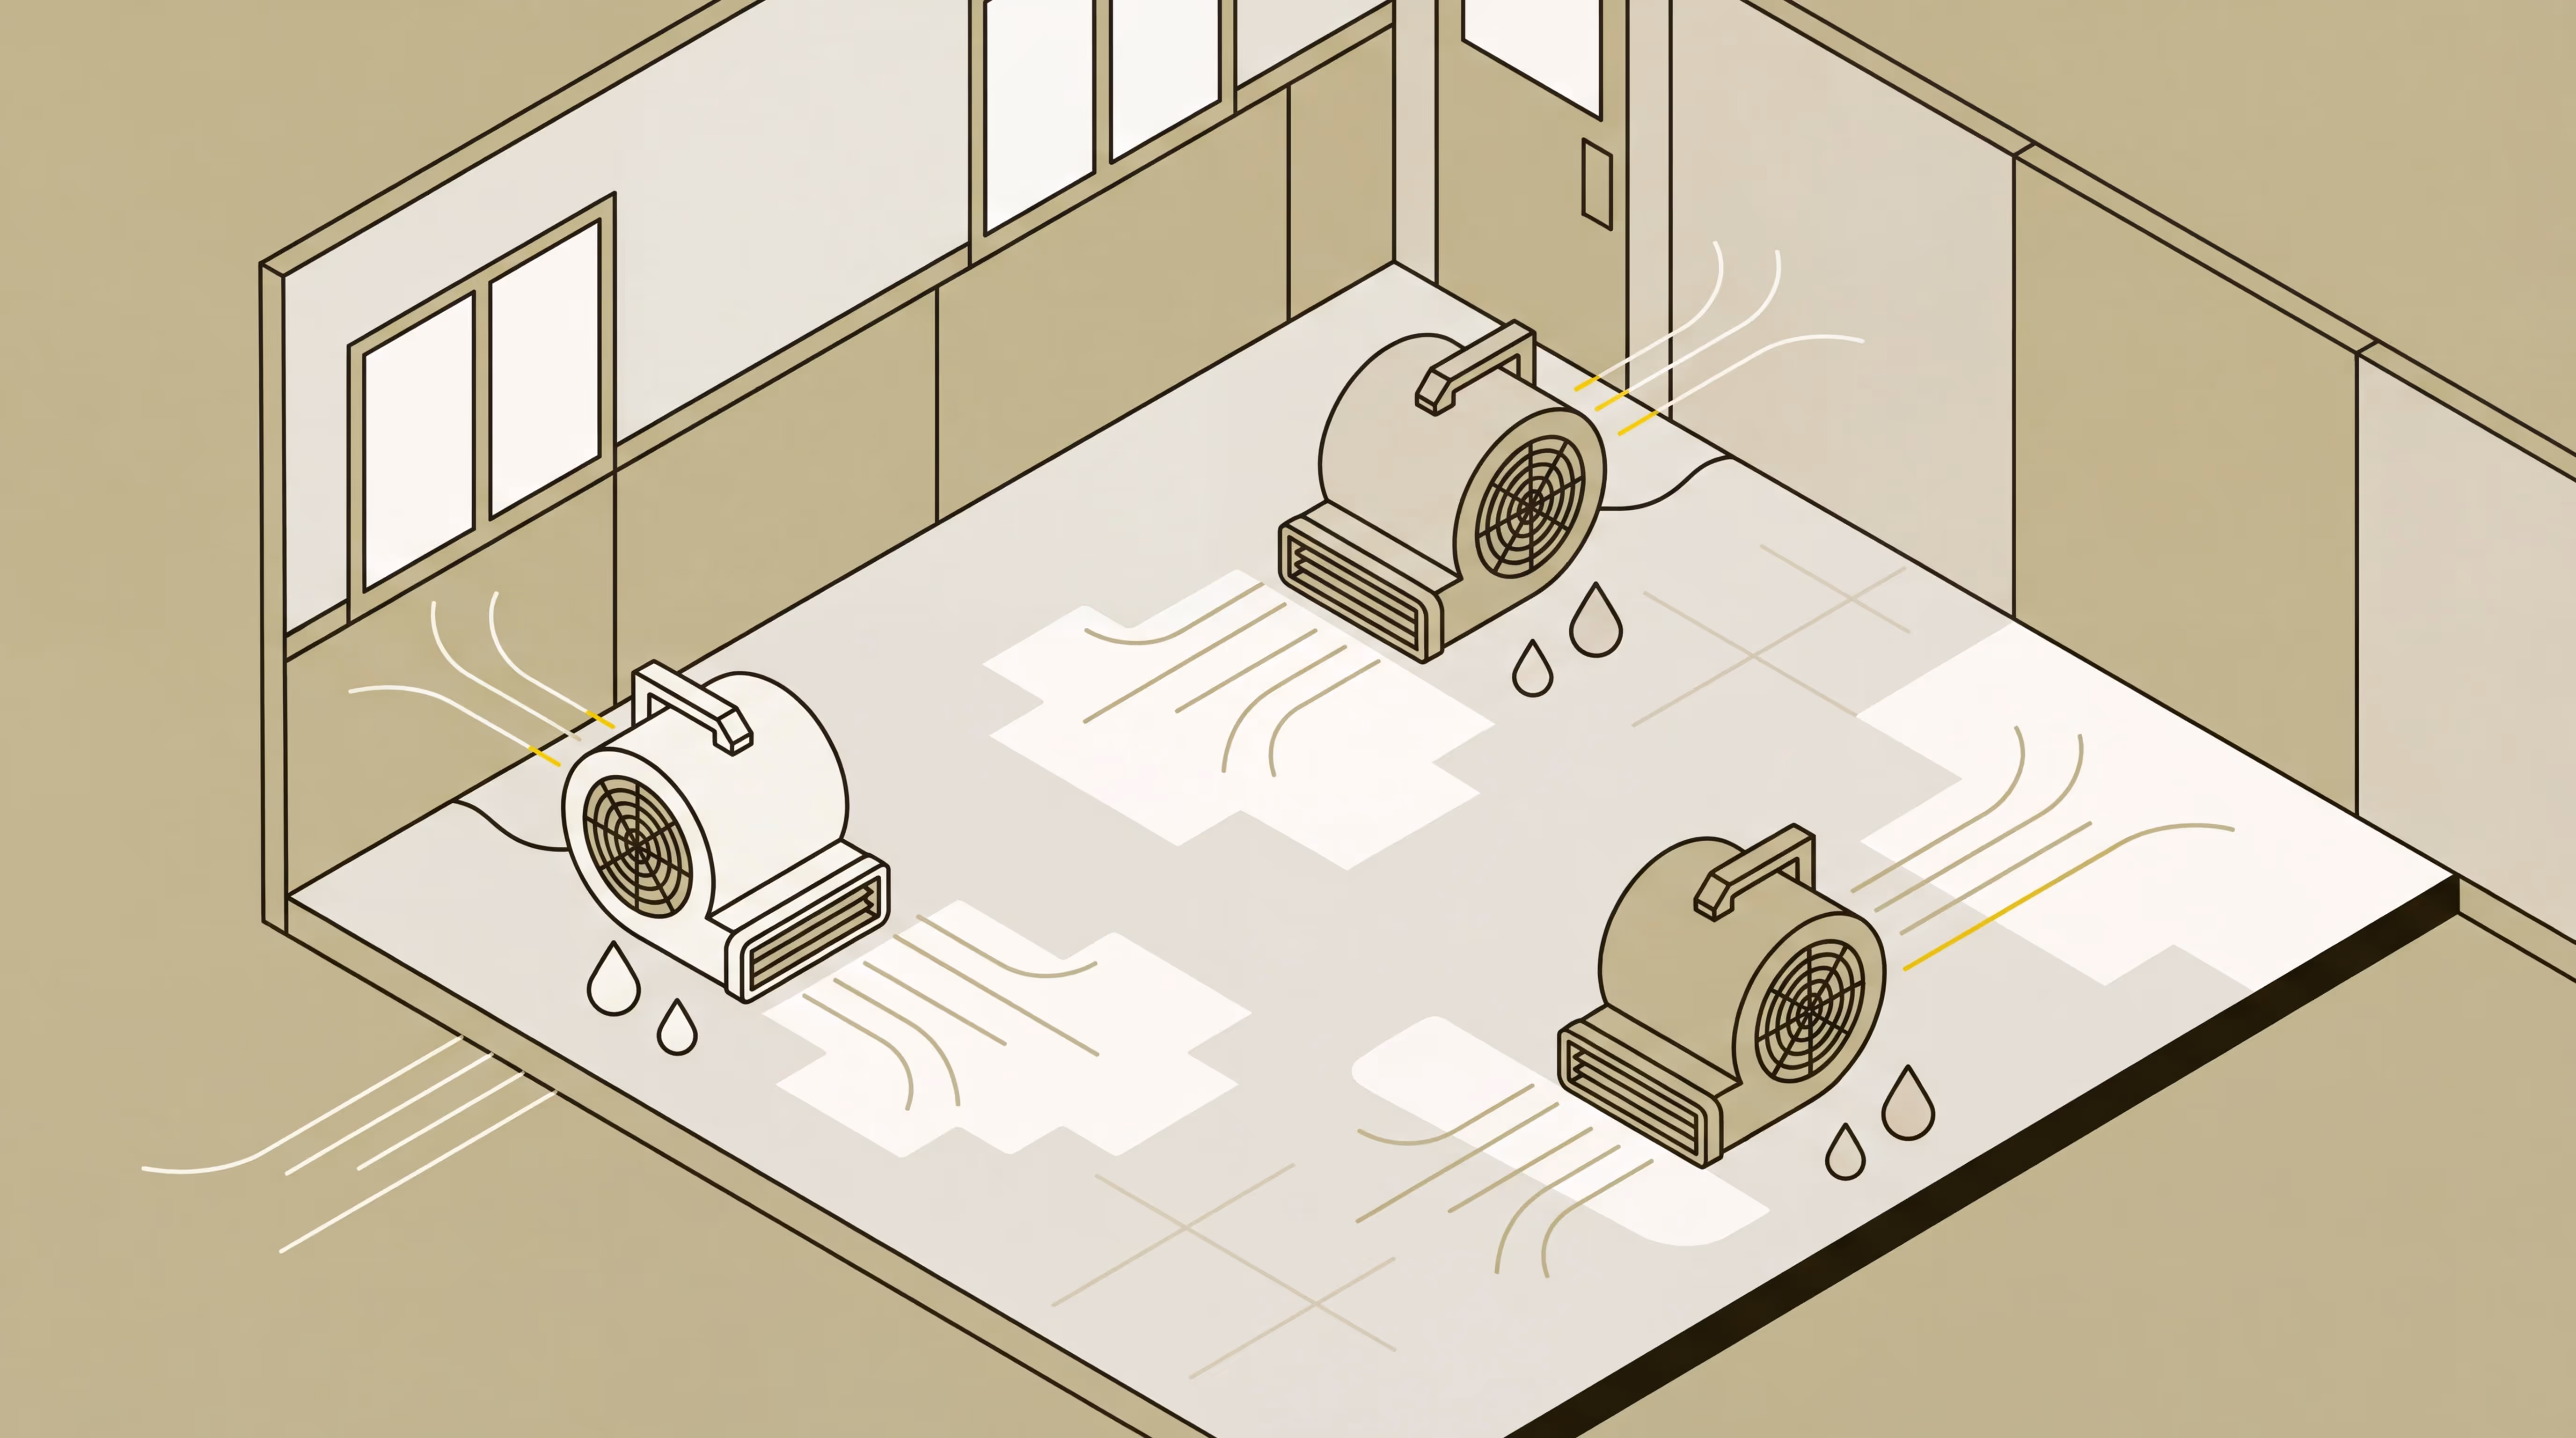
Although mitigation can seem costly at first, it saves money in the long run. Acting fast with proper drying and containment prevents structural problems and stops contamination from spreading, which can reduce reconstruction costs by thousands. The cost also reflects the skill involved. You’re sending trained technicians who can respond quickly, assess the loss, and set up the right drying equipment to prevent further damage.
A thorough estimate takes all of that into account, covering factors such as:
- Water category and cleanliness. Category 1 is clean, while Category 3 can include sewage or contaminants. That difference impacts safety protocols, equipment use, and cost.
- Size and location of the loss. A burst pipe in one room has very different implications from a leak that affects multiple levels.
- Rooms affected and materials involved. Kitchens and bathrooms often include cabinetry, tile, and plumbing lines that need careful removal or drying.
- Regional codes and labor rates. Building requirements and wage costs vary, so estimates must match the local price list.
- Speed of response and specialist equipment. 24-hour availability, drying mats, and monitoring add cost but are essential for loss control.
In my experience, restoration teams that treat the estimate as part of their mitigation strategy, rather than just paperwork, tend to receive fewer carrier questions later.
What to Include in a Water Damage Estimate
A strong water damage estimate is detailed, defensible, and supported by clear documentation. It should include:
1. All Job & Site Information
Start by outlining the basic details:
- Category of water
- Rooms affected
- Extent of the damage
For instance, if a supply line leak spreads through a kitchen and adjoining hallway, note which surfaces and materials were impacted. Include the claim number, loss address, and inspection date.
2. Detailed Documentation & Notes
Accurate documentation is what gets estimates approved quickly.
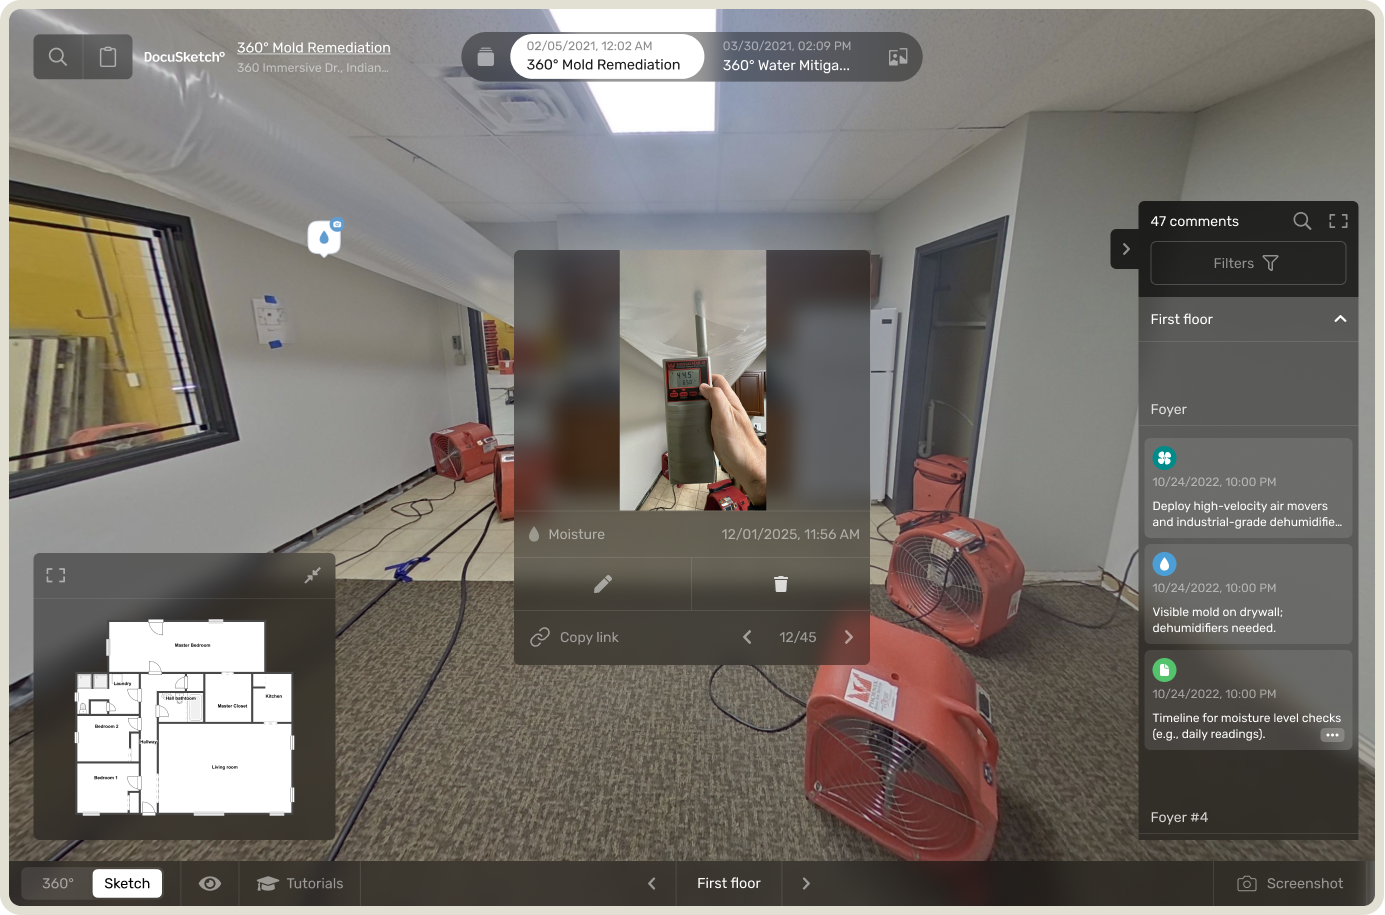
- Capture full 360° imagery using your water damage restoration software so you have a clear visual record from the start. This first round of documentation protects you if questions come up later about floor scratches, appliance dents, or pre-existing conditions.
- Capturing visual documentation of the site throughout the course of the project—before and after—will protect against disputes over floor scratches or dents on appliances that may come up.
- Record material details like drywall thickness (½ inch vs ⅝ inch), baseboard height, and material type (MDF vs finger-joint pine). These small details often explain price differences later.
- Note any approvals required by the carrier, such as “Do not tear out cabinetry without approval.” Carriers may prefer drying over replacement to control costs.
Noting these details at the start saves hours of clarification later, especially when adjusters request evidence for each room.
3. Line-Item Scope & Breakdown
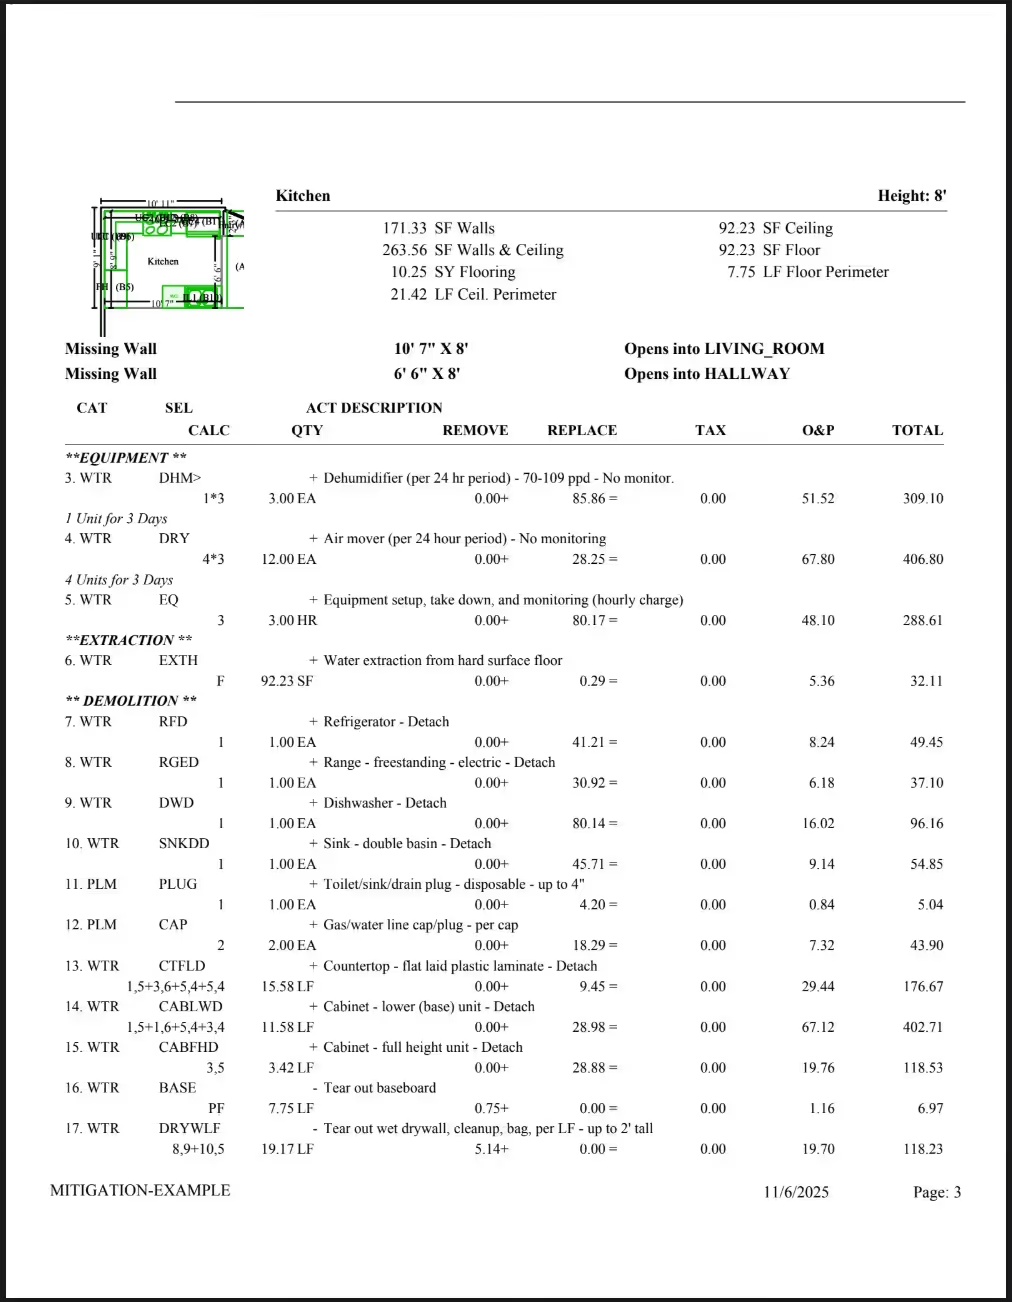
Each affected room should have its own scope of work. For example, in a kitchen, you might list:
- Extraction. Remove standing water with extraction equipment.
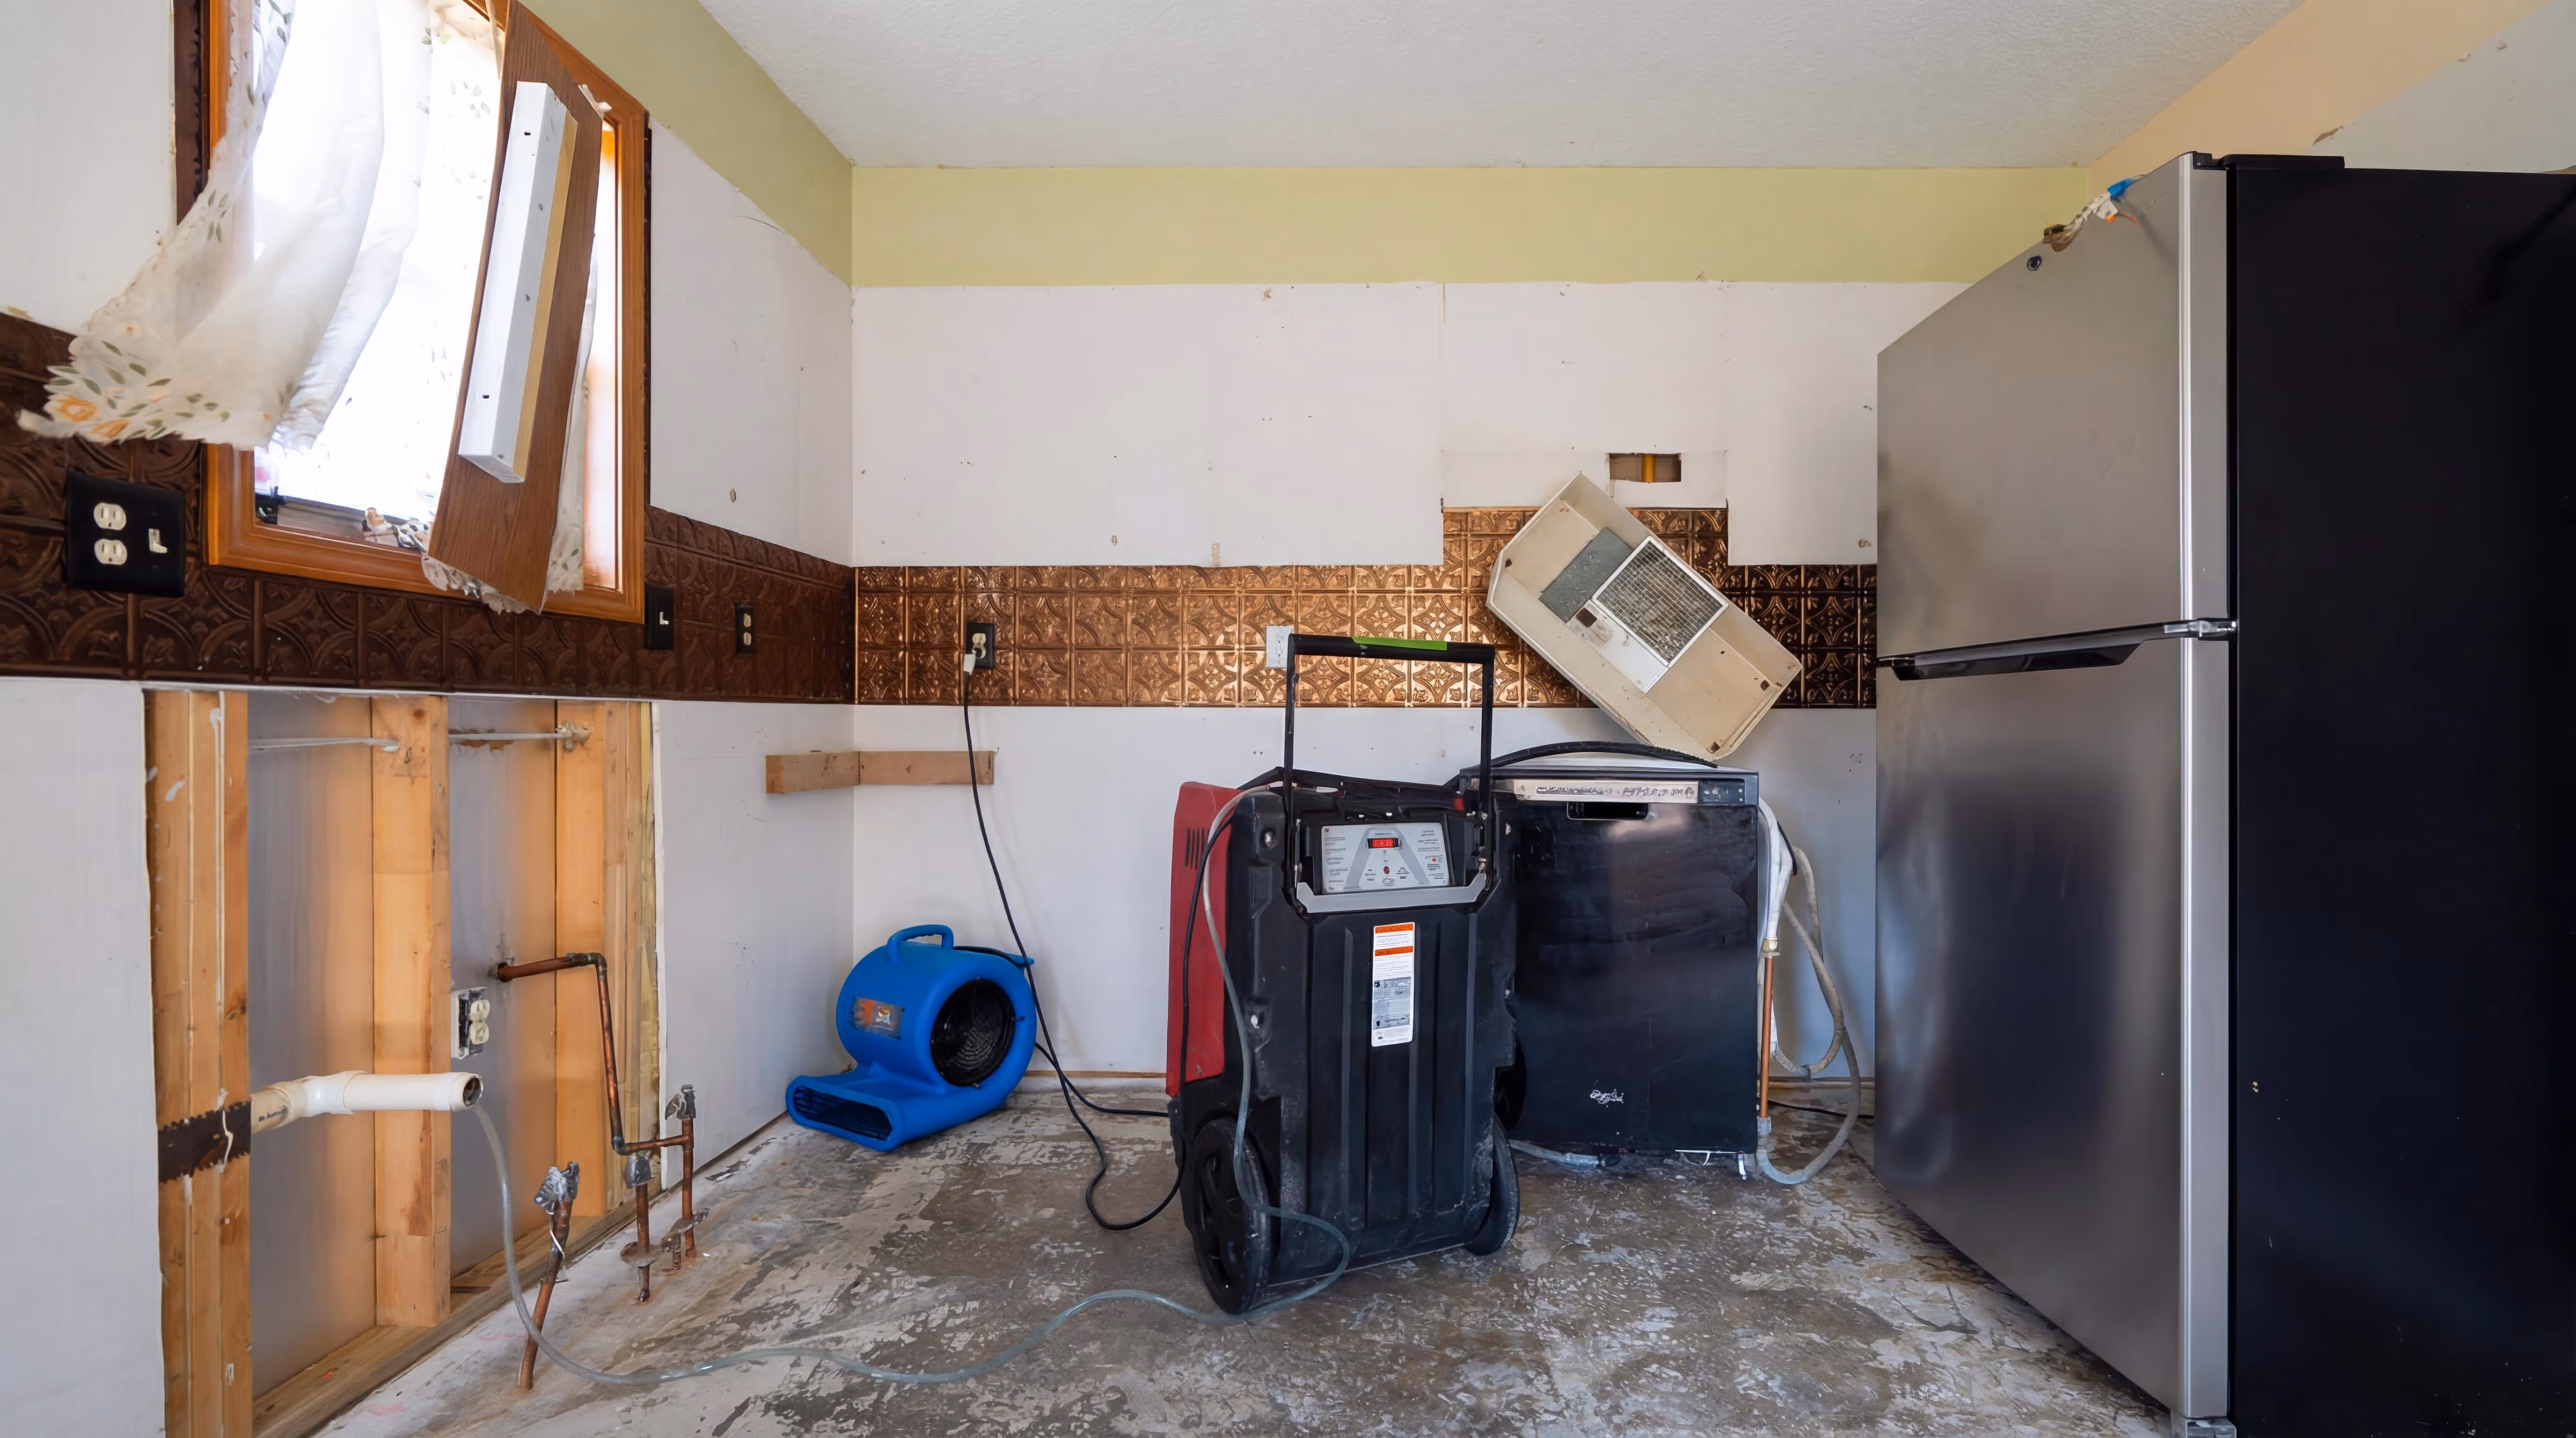
- Demolition. Remove saturated drywall or baseboards to expose hidden moisture.
- Drying. Install air movers and dehumidifiers. See How to perform IICRC air mover calculations to calculate the correct setup.
- Specialty drying. Use wood-floor drying mats or inject-dry systems if necessary, but only for the time period specified by the carrier.
- Cabinet or countertop work. Detach cabinets carefully to allow airflow; document each stage of work with detailed 360° documentation.
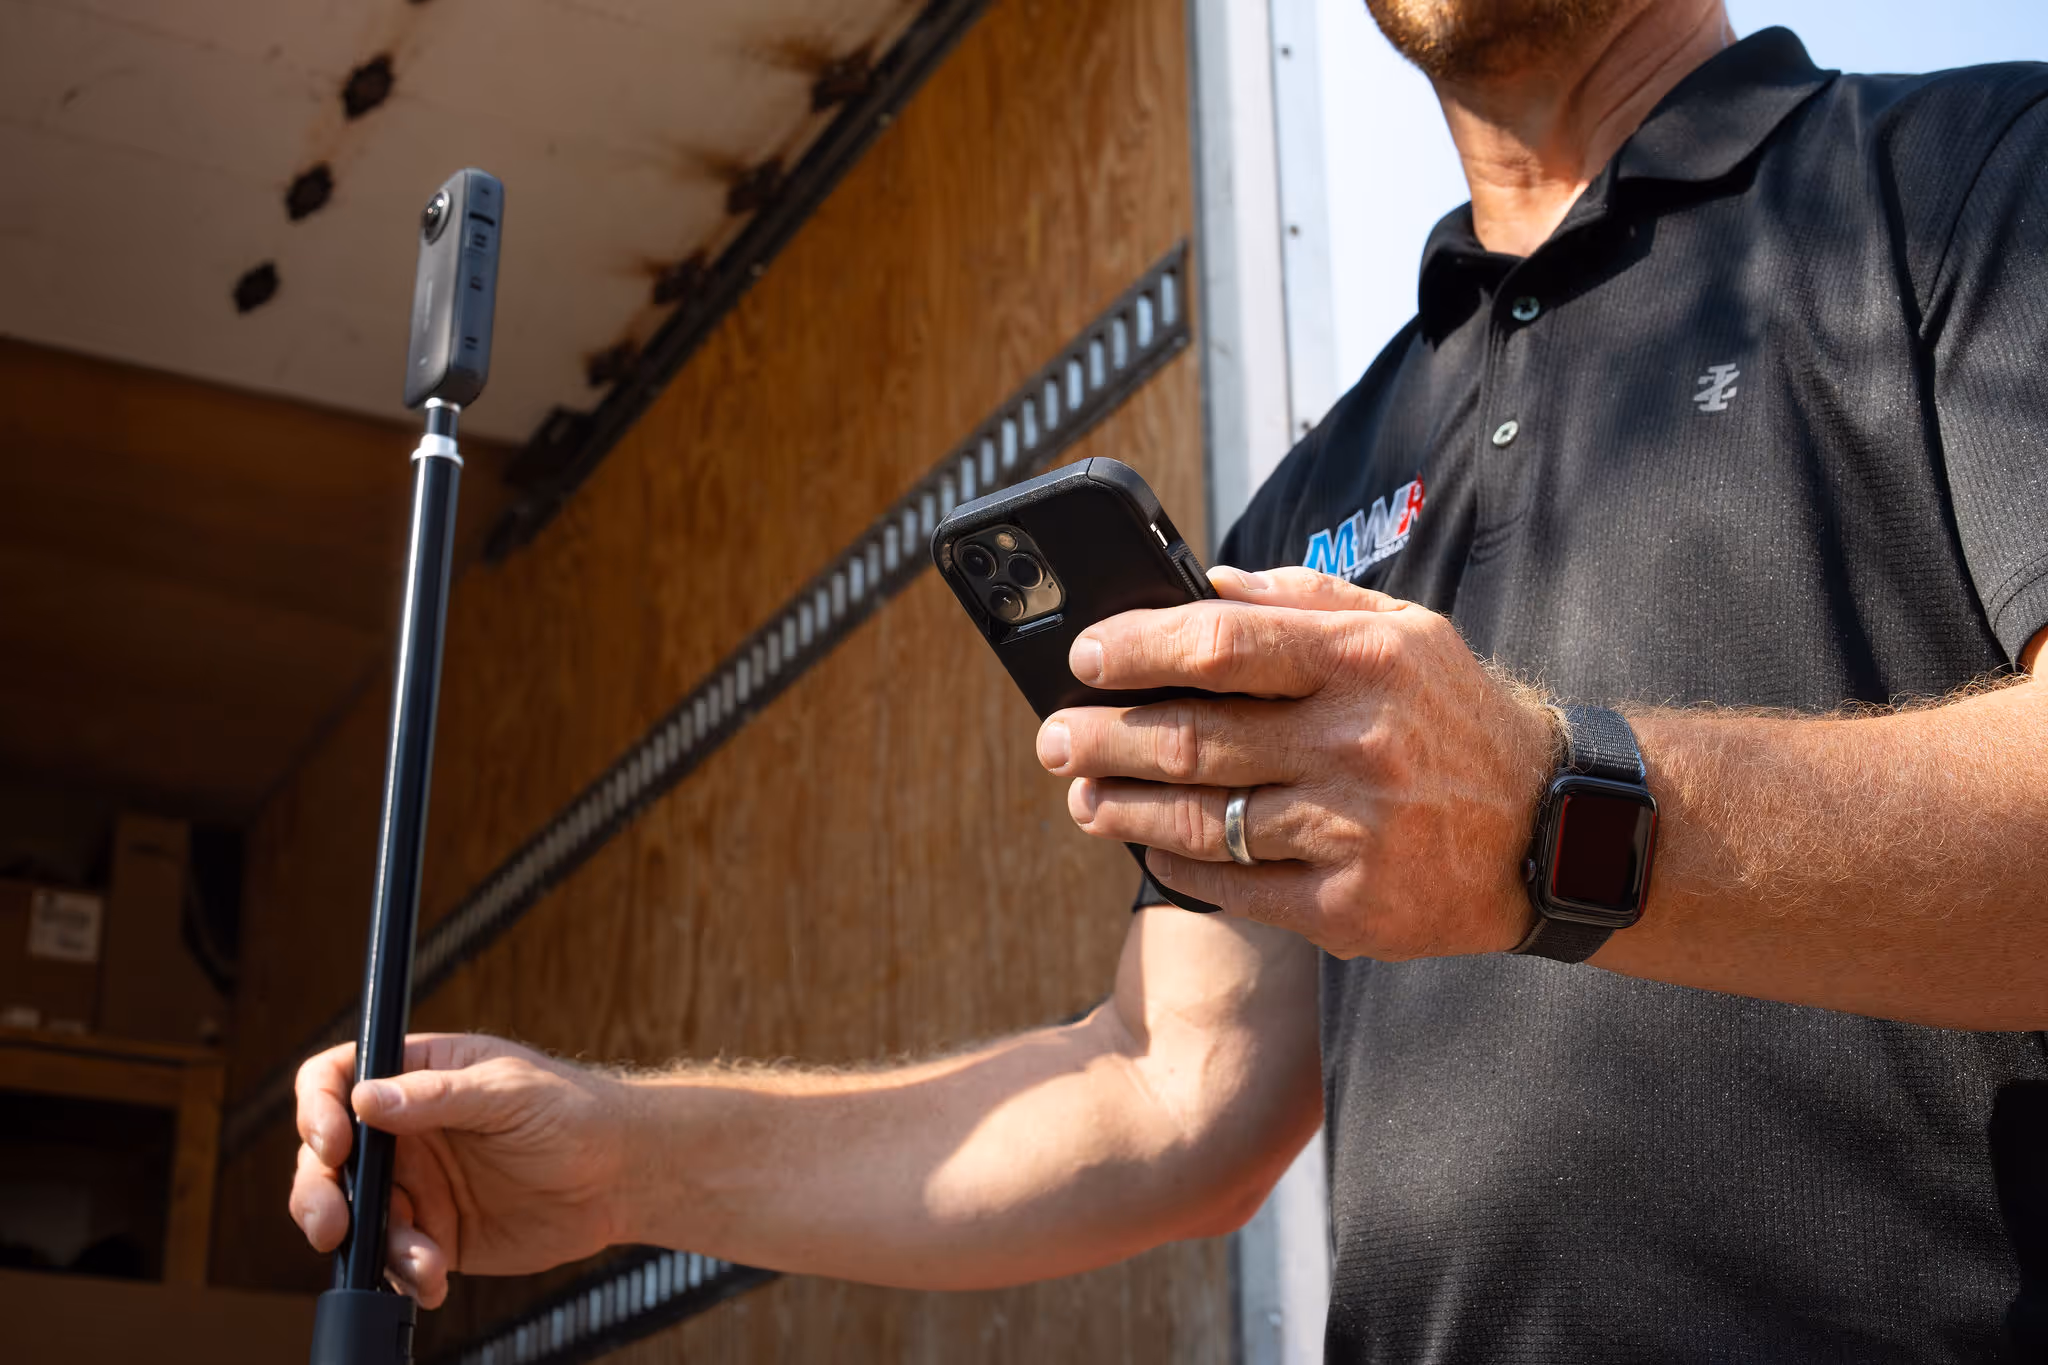
Using a tool like the DocuSketch 360° camera can help you capture scope efficiently and effectively in only a few steps. Below, see how our teammate Robb Harrell shows the process of documenting a project scope step by step, ensuring nothing is missed and your records are complete.
Complementary items are easy to overlook, especially when you’re focusing on the main scope. These are the small, junior tasks that often happen during a job but don’t make it into the estimate. When they’re left out, you still pay for the time, labor, and materials, but you don’t get reimbursed for them.
Include the smaller tasks that keep a job complete, like capping water lines, plugging sinks to prevent odours, or detaching countertops and P-traps before removing cabinets. They may seem minor, but collectively, they can amount to hours of work. Listing them shows that you’ve captured the full scope and helps make sure you’re paid for everything your team actually does on-site.
4. Unit Pricing Using Price Lists
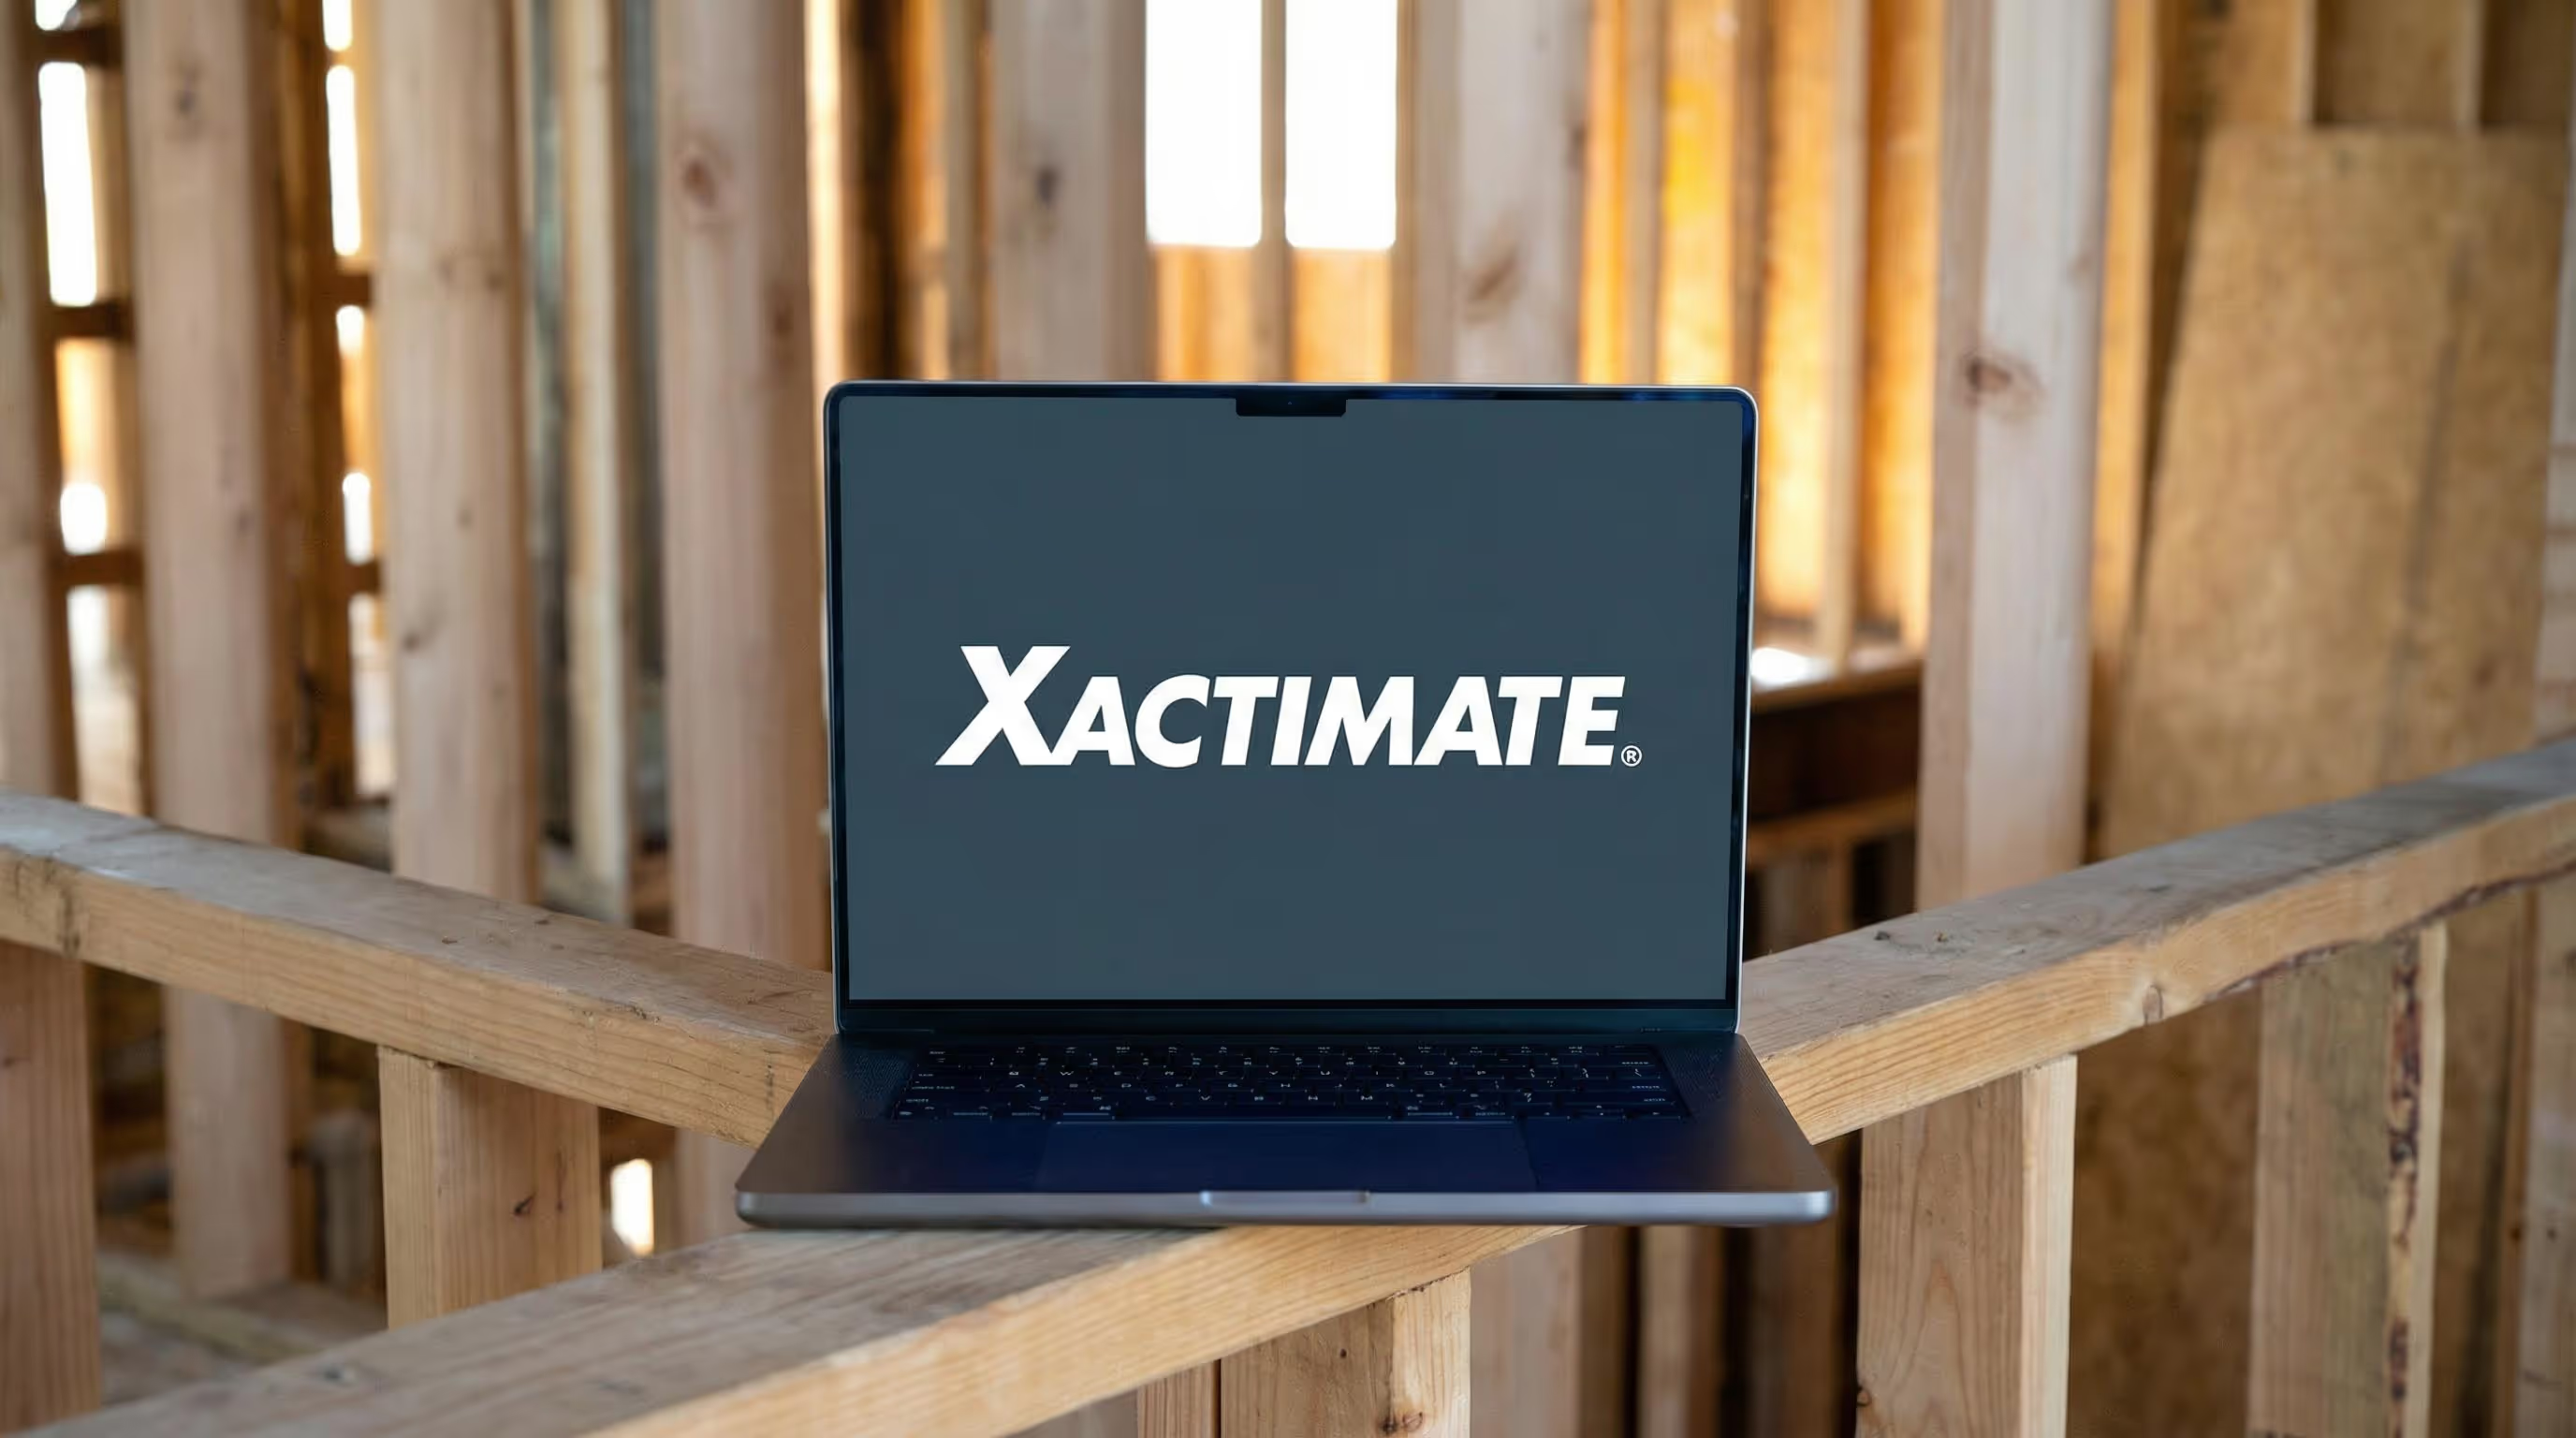
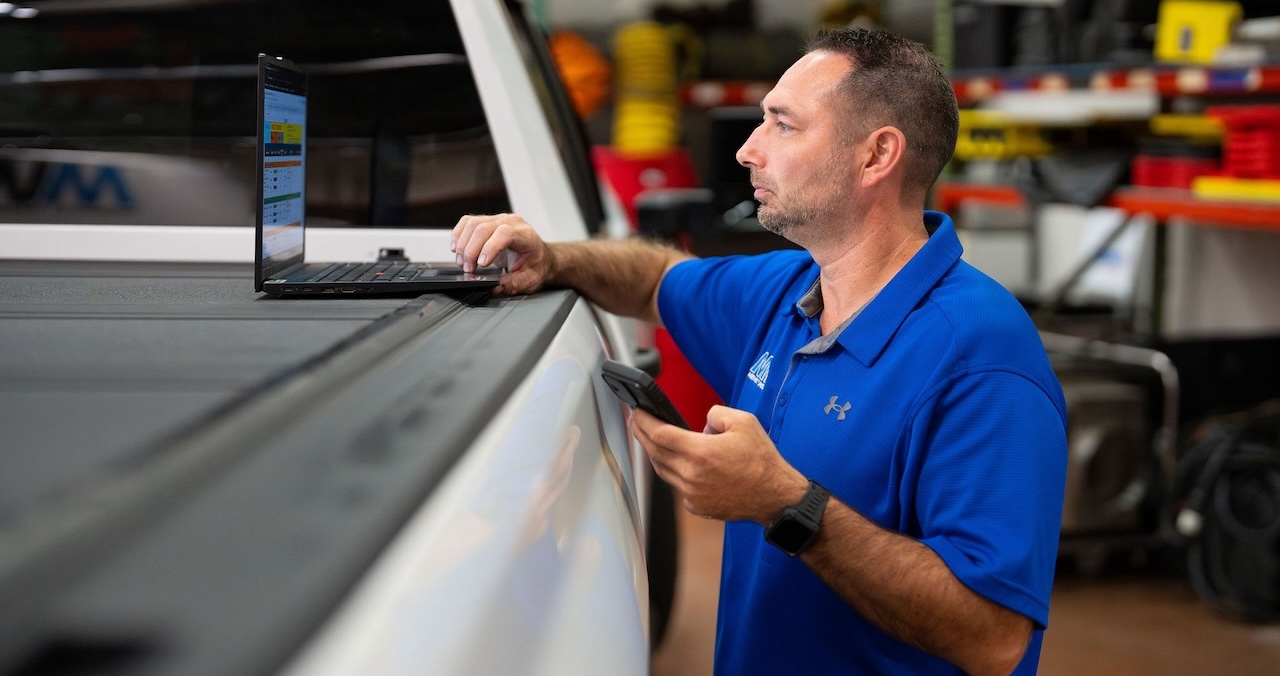
Always select the correct regional price list in Xactimate or Symbility, whatever your preferred estimating software is. It doesn’t auto-populate, and labor and material costs vary significantly by location.
Experienced estimators rely on standard codes, such as WTR CAB LWD, to build accurate scopes and pricing. Using these codes ensures consistent estimates and streamlines the process across all projects.
See How to write an Xactimate estimate for step-by-step guidance on aligning your price list with your documentation.
Every estimate needs solid proof to back it up. Good documentation demonstrates why the work was necessary, what was accomplished, and that everything met the required standards. It also makes reviews faster because carriers can see the evidence for themselves.
Before-and-after documentation
Using visual documentation through the course of your project is key. Before and after site captures help tell the story of a job from start to finish. With DocuSketch, you can record a full 360° view of the site on day one and then again after drying and cleanup. This visual record shows the extent of the damage and how the space changed, which helps everyone understand the work completed and why each step was necessary.
Drying logs
Logs record daily readings for humidity and moisture. They demonstrate that the drying process was under control and adhered to IICRC standards. When your logs are clear and complete, there’s no confusion about equipment runtime or billing.
READ MORE: How to build a water damage drying log
Moisture mapping
Moisture maps highlight exactly where water spread and which materials were affected. They support your decisions on why you removed drywall to a certain height or targeted specific rooms for drying.
Good documentation does more than support your estimate. It protects your team, builds trust with carriers, and helps you obtain approvals more quickly.
6. Optional Sections
Payment terms
- Program work follows the terms of the insurer or third-party administrator, usually with their preset payment timelines.
- Direct-to-homeowner work requires a signed work authorization. Clearly spell out payment expectations before starting.
Notes and authorizations
Use this section to add any clarifications or special conditions. Simple notes, such as “Carrier approval required before removing cabinetry” or “After-hours access needed for this site,” can save you time later. They show you’ve thought ahead and help prevent misunderstandings once the claim is reviewed.
Access and protection items
Don’t forget about protection in rooms that weren’t directly affected by the loss. A temporary floor covering in the entryway, for instance, stops scratches or dirt while you move in drying equipment. Small details like these show care for the property, protect your team’s work, and reduce the chance of damage claims down the line.
How to Fill Out a Water Damage Estimate Correctly
Step 1: Gather Complete On-Site Information
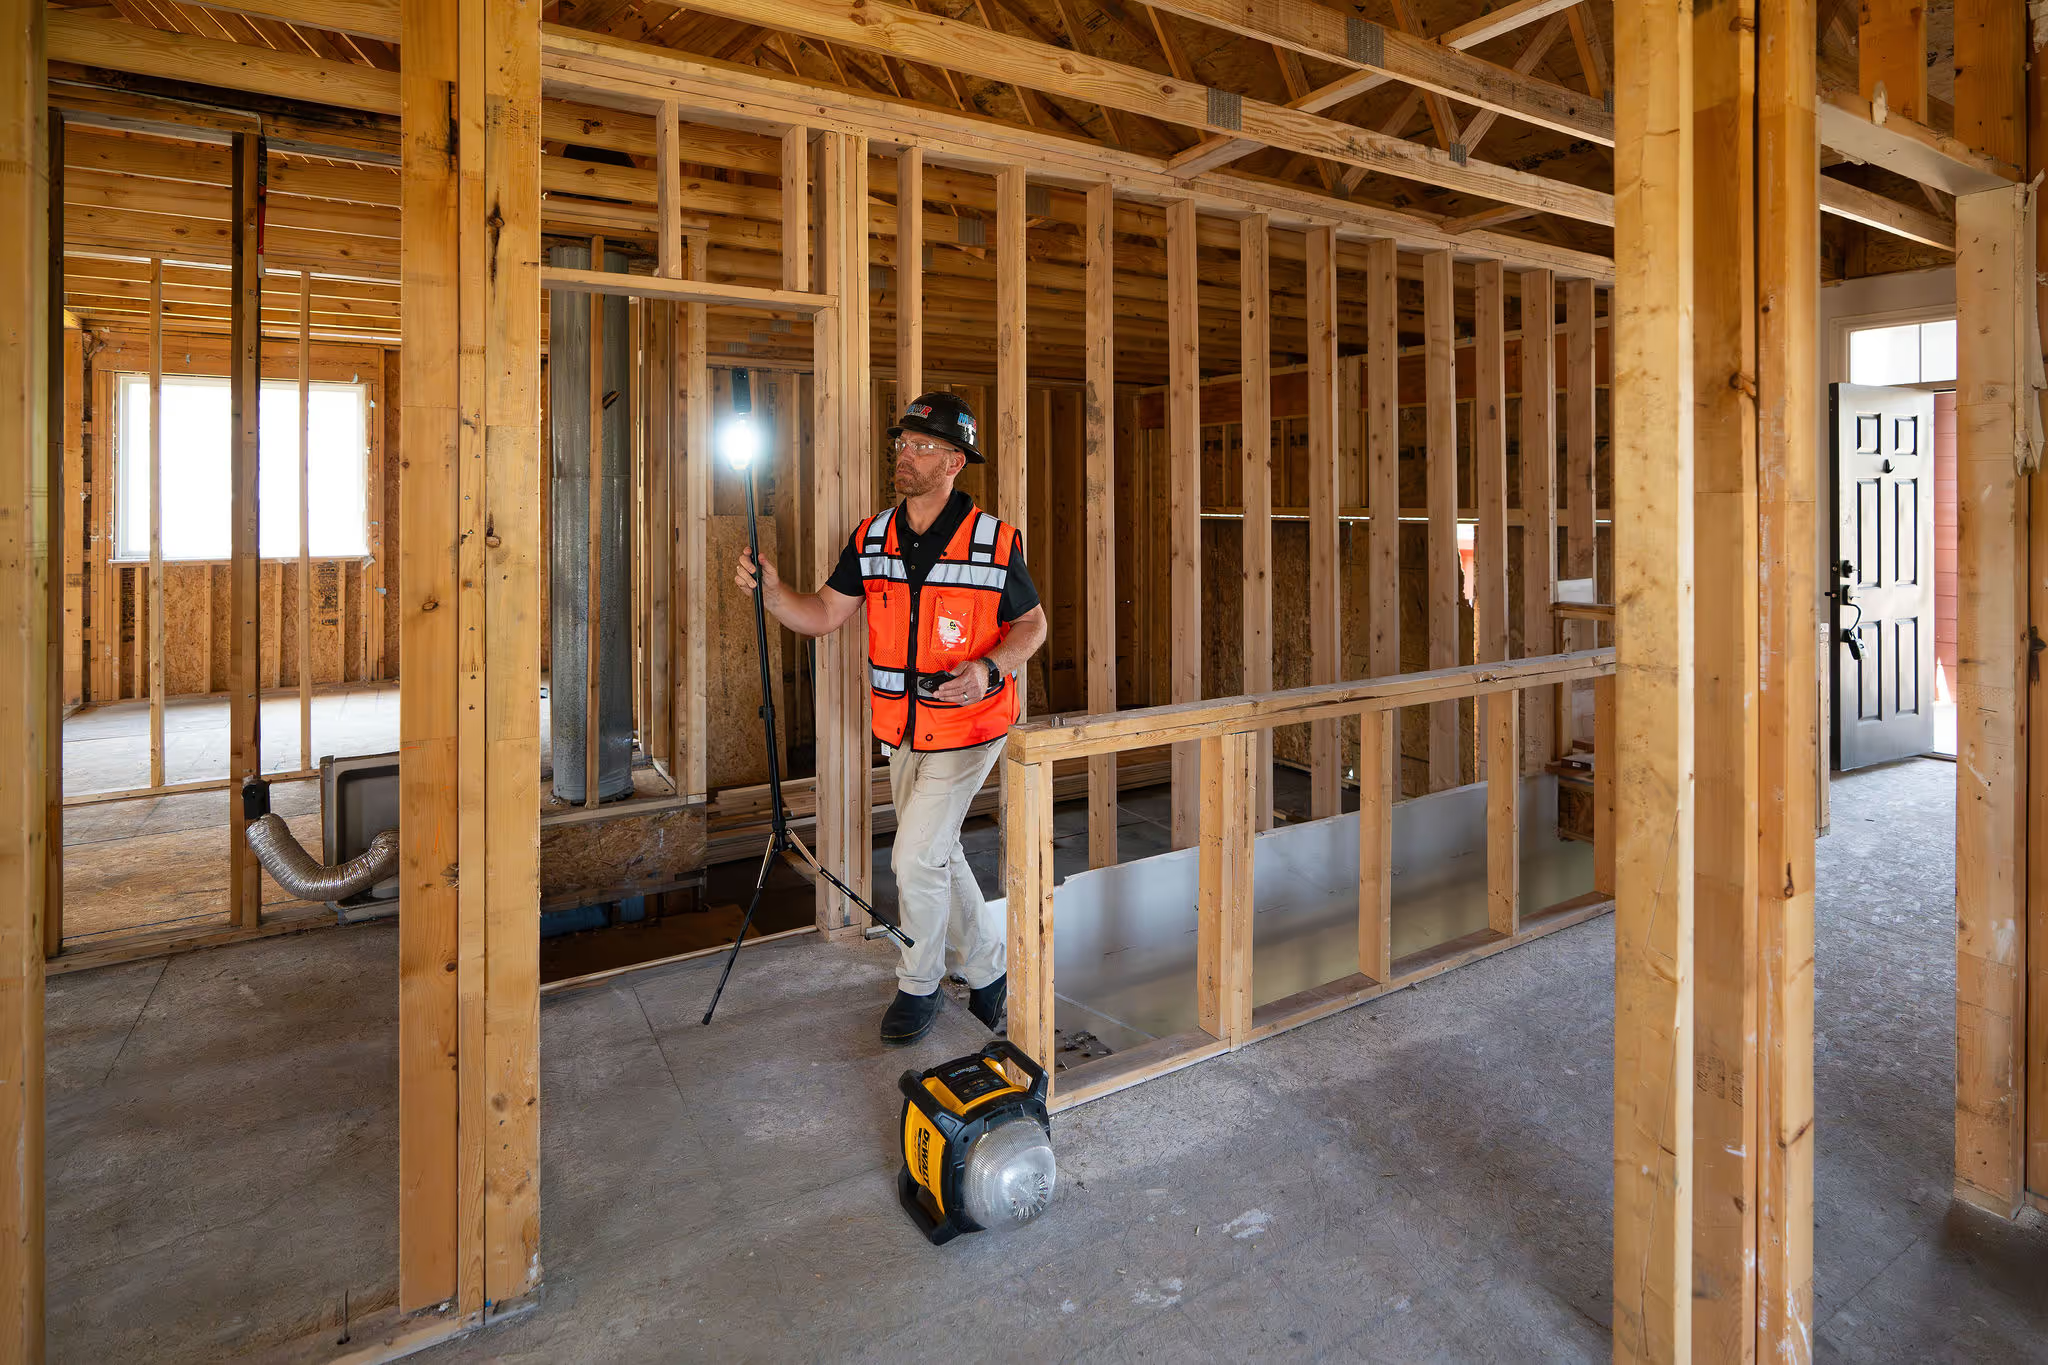
The foundation of every accurate estimate is clear visual documentation. Using DocuSketch to capture immersive 360° documentation on day one gives you a complete view of the site before any work begins. Do the same after demolition so you have a precise record of what changed and why. Measure everything and document details that can’t be seen in photos, such as insulation type or flooring thickness. If you’re drying hardwood, note the species and thickness, since overdrying can cause it to warp.
Step 2: Define the Scope Accurately
Decide what can be dried versus what must be removed. Include any carrier approval points in the notes section. For example, drywall can be removed up to two feet high, while cabinets may require written approval from the adjuster before removal.
Step 3: Select the Correct Price list
Select the regional Xactimate or Symbility price list that matches your location. This is one way to ensure your labor and material rates align with local standards. Using the wrong region’s rates can trigger review delays or rejections.
Xactimate does allow you to change pricing of line items. In fact, their licensing agreement makes it clear that changes to pricing can be made “where contractor requirements, market conditions, demand or any other factor warrants the use of a different line item price in the specific situation”.
Step 4: Enter Line Items and Complementary Items
Understanding the “waterfall effect” is one of the most significant differences between a junior and an experienced estimator. Every task on-site leads to several follow-up steps, and missing them creates inconsistencies that slow down approvals.
Removing cabinets
When you remove cabinetry, you’re not just lifting boxes off the wall; you're also removing the items attached to them. You need to detach the countertop, disconnect plumbing, and cap the water lines. If those steps aren’t listed in your estimate, they’ll still be completed on-site, but you won’t be compensated for them. Including them in documentation demonstrates a comprehensive understanding of the workflow and prevents unpaid labor.
Installing drying equipment
Drying equipment requires ongoing monitoring and care. Filters need to be replaced, power usage must be tracked, and readings should be documented daily. These details prove that you’re managing the loss responsibly rather than simply setting up equipment and leaving it.
Protecting floors and plugging sinks
Even in areas that aren’t directly affected by water, small protective steps make a difference. Floor coverings prevent scratches from equipment, and installing drain plugs to detached plumbing components will stop odours and potential backflow. Adding these line items shows foresight and reduces the chance of secondary damage.
Accurate complementary items aren’t padding. They reflect the real scope of work and ensures compensation for work completed, including protecting the jobsite and looking out for the health and safety of workers and occupants.
Step 5: Link Your Documentation
Attach 360° captures, scope notes, and measurements for every line item. That level of transparency builds trust with carriers and shortens review times.
Common Errors in Water Damage Estimates
Even minor oversights can delay payment or lead to revision requests. Here’s what to look out for and how to avoid it.
Missing complementary items
This is the most common mistake among new estimators. Tasks such as capping water lines or removing debris after demolition are often overlooked. Review your scope line by line to make sure all related work is included.
Misidentifying materials
Mistaking MDF for pine or laminate for hardwood can cause significant price differences. Always confirm material types on-site and include them in your notes. It avoids confusion and keeps your estimate consistent with field conditions.
Not recording on-site details
Images don’t capture everything you need. Take note of measurements, material thickness, and finish types while you’re on-site. These small details support your pricing later and demonstrate that your scope is based on real conditions, not assumptions.
Using the wrong regional price list
Xactimate doesn’t automatically select the correct region, so it’s worth checking before exporting. Using the wrong list can make your estimate appear inflated or underpriced, which often leads to delays during the review process.
Over-drying wood floors or exceeding allowed time
Specialty drying takes skill and close monitoring. Track moisture levels carefully and stop once progress levels off. Carriers only pay for the approved drying period, so this attention protects both your results and your revenue.
Removing cabinetry without approval
Always confirm approval before removing items that may be costly to replace. It prevents disputes and shows you’re working in step with the claim process.
Omitting access or protection items in unaffected rooms
Access and protection are part of good site care. Add protective measures such as temporary floor coverings or door barriers, even in dry rooms. These steps prevent secondary damage and show that your team took care around the property. Homeowners are often especially sensitive after a loss, so documenting that you kept all areas well-maintained, clean, and free from scratches helps avoid misunderstandings later.
Ignoring carrier rules for after-hours or weekend work
Program carriers often define their own “after-hours” windows. If you bill outside those limits, your charges might be questioned. Know each carrier’s policy and note exceptions directly in your estimate.
Strong estimates come down to detail. When every task, measurement, and material is backed by evidence, you reduce questions, speed up approvals, and build trust on every job.
How DocuSketch Simplifies the Water Damage Estimating Process
1. 360° Capture for Instant, Defensible Documentation
DocuSketch’s 360° documentation gives you verifiable proof of a property’s condition from day one. Every surface, fixture, and affected area is thoroughly documented, creating a clear record that helps prevent disputes about pre-existing damage.
You can revisit the job virtually at any time to check materials, confirm measurements, or track progress. For contractors, that means fewer missed details. For carriers, it provides immediate visibility into the loss without requiring additional photos or site notes.
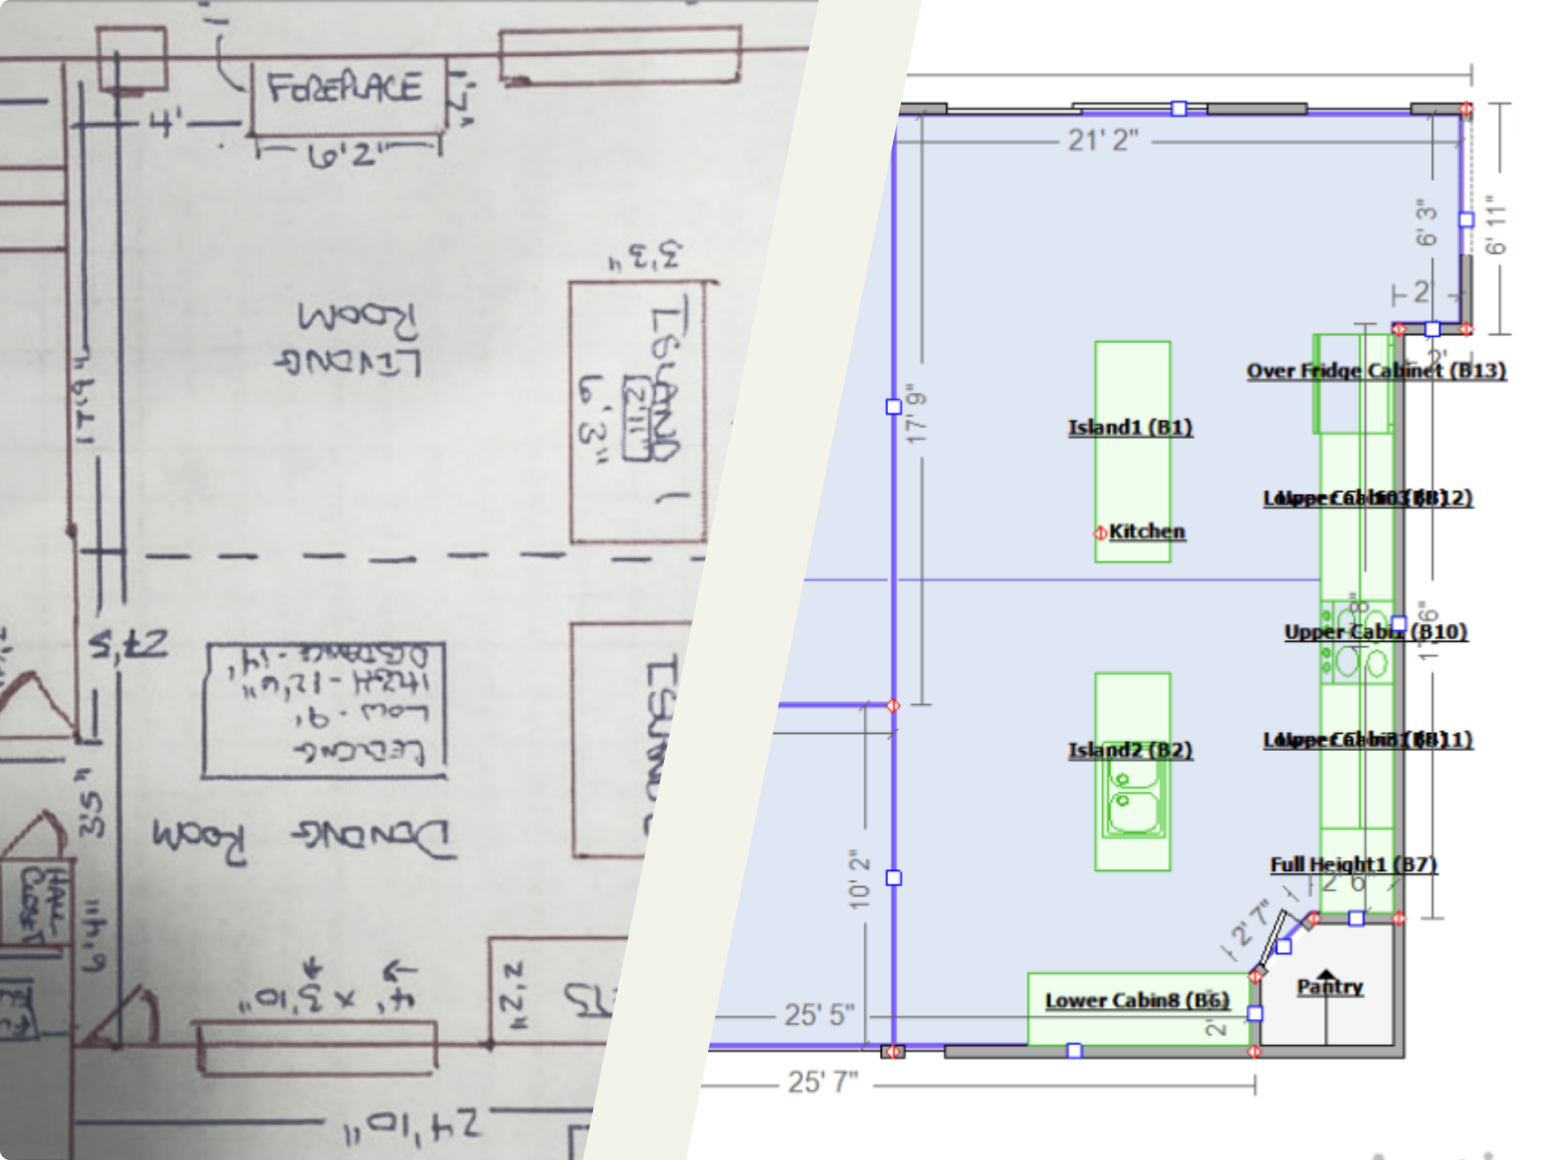
2. Sketch Creation (If Contractor Chooses)
DocuSketch automatically generates detailed floor plans from your 360° documentation, integrating seamlessly with Xactimate and Symbility so every dimension matches the real property layout.
It saves hours of manual measuring and rework while keeping documentation and line items perfectly in sync. From a single-room leak to a full-property flood, every estimate is based on reliable, verifiable measurements that carriers can trust.
3. Full Estimating (Using DocuSketch Estimating)
With DocuSketch Estimating, you can collaborate with experienced estimators who review your scope and refine it before submission. They’ll identify complementary items that might have been missed and check that pricing and codes match your region.
The process is hands-on and collaborative. You’ll get real-time feedback, learn how each line item connects, and become more confident with every project.
If you want to get extra support on your estimate review process, try our free Estimate Grader. It will provide an estimate review to catch costly mistakes, improve accuracy, and help you write more consistent, compliant estimates in under 10 minutes.
4. Faster Approvals and Fewer Disputes
When your documentation, sketches, and pricing line up, approvals follow quickly. Adjusters can see exactly what you saw on-site, reducing the need for questions, emails, and revisions. That transparency speeds up payment and strengthens trust with both carriers and homeowners.
The difference between a good estimate and a great one often comes down to documentation. When every room, material, and action is backed by clear evidence, you can stand behind your work with confidence, and carriers recognize that.
DocuSketch provides that clarity from the very start. Whether you’re capturing the loss, building your sketch, or finalizing your estimate, the platform helps you work faster, document smarter, and maintain accuracy without cutting corners.
Start your next estimate using DocuSketch today. Book a demo to see how it can streamline your process.
Learn more about building accurate estimates:
Every water mitigation job begins with a story: where the water came from, how far it spread, and what’s needed to stop it from causing more harm. A water damage estimate captures that story in numbers, turning fieldwork into a document carriers can trust. When it’s accurate, approvals move faster, disputes fade, and projects stay on track from first call to final payment.
Example water damage estimate
This is a sample water damage estimate created in Xactimate. It shows how clear visual documentation and accurate measurements translate into a complete, defensible scope for a four room, 1,621.19 SF (Walls and Ceiling) property.
Click here to download this example water damage estimate.
What Is a Water Damage Estimate?
A water damage estimate is a detailed assessment created for unscheduled, time-sensitive work performed to prevent active water damage from spreading.
Water mitigation is urgent work. Unlike renovation or reconstruction, homeowners can’t wait for quotes or scheduling. Every hour matters because the longer water sits, the more it spreads and the more contaminated it becomes.
Although mitigation can seem costly at first, it saves money in the long run. Acting fast with proper drying and containment prevents structural problems and stops contamination from spreading, which can reduce reconstruction costs by thousands. The cost also reflects the skill involved. You’re sending trained technicians who can respond quickly, assess the loss, and set up the right drying equipment to prevent further damage.
A thorough estimate takes all of that into account, covering factors such as:
- Water category and cleanliness. Category 1 is clean, while Category 3 can include sewage or contaminants. That difference impacts safety protocols, equipment use, and cost.
- Size and location of the loss. A burst pipe in one room has very different implications from a leak that affects multiple levels.
- Rooms affected and materials involved. Kitchens and bathrooms often include cabinetry, tile, and plumbing lines that need careful removal or drying.
- Regional codes and labor rates. Building requirements and wage costs vary, so estimates must match the local price list.
- Speed of response and specialist equipment. 24-hour availability, drying mats, and monitoring add cost but are essential for loss control.
In my experience, restoration teams that treat the estimate as part of their mitigation strategy, rather than just paperwork, tend to receive fewer carrier questions later.
What to Include in a Water Damage Estimate
A strong water damage estimate is detailed, defensible, and supported by clear documentation. It should include:
1. All Job & Site Information
Start by outlining the basic details:
- Category of water
- Rooms affected
- Extent of the damage
For instance, if a supply line leak spreads through a kitchen and adjoining hallway, note which surfaces and materials were impacted. Include the claim number, loss address, and inspection date.
2. Detailed Documentation & Notes
Accurate documentation is what gets estimates approved quickly.
- Capture full 360° imagery using your water damage restoration software so you have a clear visual record from the start. This first round of documentation protects you if questions come up later about floor scratches, appliance dents, or pre-existing conditions.
- Capturing visual documentation of the site throughout the course of the project—before and after—will protect against disputes over floor scratches or dents on appliances that may come up.
- Record material details like drywall thickness (½ inch vs ⅝ inch), baseboard height, and material type (MDF vs finger-joint pine). These small details often explain price differences later.
- Note any approvals required by the carrier, such as “Do not tear out cabinetry without approval.” Carriers may prefer drying over replacement to control costs.
Noting these details at the start saves hours of clarification later, especially when adjusters request evidence for each room.
3. Line-Item Scope & Breakdown
Each affected room should have its own scope of work. For example, in a kitchen, you might list:
- Extraction. Remove standing water with extraction equipment.
- Demolition. Remove saturated drywall or baseboards to expose hidden moisture.
- Drying. Install air movers and dehumidifiers. See How to perform IICRC air mover calculations to calculate the correct setup.
- Specialty drying. Use wood-floor drying mats or inject-dry systems if necessary, but only for the time period specified by the carrier.
- Cabinet or countertop work. Detach cabinets carefully to allow airflow; document each stage of work with detailed 360° documentation.
Using a tool like the DocuSketch 360° camera can help you capture scope efficiently and effectively in only a few steps. Below, see how our teammate Robb Harrell shows the process of documenting a project scope step by step, ensuring nothing is missed and your records are complete.
Complementary items are easy to overlook, especially when you’re focusing on the main scope. These are the small, junior tasks that often happen during a job but don’t make it into the estimate. When they’re left out, you still pay for the time, labor, and materials, but you don’t get reimbursed for them.
Include the smaller tasks that keep a job complete, like capping water lines, plugging sinks to prevent odours, or detaching countertops and P-traps before removing cabinets. They may seem minor, but collectively, they can amount to hours of work. Listing them shows that you’ve captured the full scope and helps make sure you’re paid for everything your team actually does on-site.
4. Unit Pricing Using Price Lists
Always select the correct regional price list in Xactimate or Symbility, whatever your preferred estimating software is. It doesn’t auto-populate, and labor and material costs vary significantly by location.
Experienced estimators rely on standard codes, such as WTR CAB LWD, to build accurate scopes and pricing. Using these codes ensures consistent estimates and streamlines the process across all projects.
See How to write an Xactimate estimate for step-by-step guidance on aligning your price list with your documentation.
Every estimate needs solid proof to back it up. Good documentation demonstrates why the work was necessary, what was accomplished, and that everything met the required standards. It also makes reviews faster because carriers can see the evidence for themselves.
Before-and-after documentation
Using visual documentation through the course of your project is key. Before and after site captures help tell the story of a job from start to finish. With DocuSketch, you can record a full 360° view of the site on day one and then again after drying and cleanup. This visual record shows the extent of the damage and how the space changed, which helps everyone understand the work completed and why each step was necessary.
Drying logs
Logs record daily readings for humidity and moisture. They demonstrate that the drying process was under control and adhered to IICRC standards. When your logs are clear and complete, there’s no confusion about equipment runtime or billing.
READ MORE: How to build a water damage drying log
Moisture mapping
Moisture maps highlight exactly where water spread and which materials were affected. They support your decisions on why you removed drywall to a certain height or targeted specific rooms for drying.
Good documentation does more than support your estimate. It protects your team, builds trust with carriers, and helps you obtain approvals more quickly.
6. Optional Sections
Payment terms
- Program work follows the terms of the insurer or third-party administrator, usually with their preset payment timelines.
- Direct-to-homeowner work requires a signed work authorization. Clearly spell out payment expectations before starting.
Notes and authorizations
Use this section to add any clarifications or special conditions. Simple notes, such as “Carrier approval required before removing cabinetry” or “After-hours access needed for this site,” can save you time later. They show you’ve thought ahead and help prevent misunderstandings once the claim is reviewed.
Access and protection items
Don’t forget about protection in rooms that weren’t directly affected by the loss. A temporary floor covering in the entryway, for instance, stops scratches or dirt while you move in drying equipment. Small details like these show care for the property, protect your team’s work, and reduce the chance of damage claims down the line.
How to Fill Out a Water Damage Estimate Correctly
Step 1: Gather Complete On-Site Information
The foundation of every accurate estimate is clear visual documentation. Using DocuSketch to capture immersive 360° documentation on day one gives you a complete view of the site before any work begins. Do the same after demolition so you have a precise record of what changed and why. Measure everything and document details that can’t be seen in photos, such as insulation type or flooring thickness. If you’re drying hardwood, note the species and thickness, since overdrying can cause it to warp.
Step 2: Define the Scope Accurately
Decide what can be dried versus what must be removed. Include any carrier approval points in the notes section. For example, drywall can be removed up to two feet high, while cabinets may require written approval from the adjuster before removal.
Step 3: Select the Correct Price list
Select the regional Xactimate or Symbility price list that matches your location. This is one way to ensure your labor and material rates align with local standards. Using the wrong region’s rates can trigger review delays or rejections.
Xactimate does allow you to change pricing of line items. In fact, their licensing agreement makes it clear that changes to pricing can be made “where contractor requirements, market conditions, demand or any other factor warrants the use of a different line item price in the specific situation”.
Step 4: Enter Line Items and Complementary Items
Understanding the “waterfall effect” is one of the most significant differences between a junior and an experienced estimator. Every task on-site leads to several follow-up steps, and missing them creates inconsistencies that slow down approvals.
Removing cabinets
When you remove cabinetry, you’re not just lifting boxes off the wall; you're also removing the items attached to them. You need to detach the countertop, disconnect plumbing, and cap the water lines. If those steps aren’t listed in your estimate, they’ll still be completed on-site, but you won’t be compensated for them. Including them in documentation demonstrates a comprehensive understanding of the workflow and prevents unpaid labor.
Installing drying equipment
Drying equipment requires ongoing monitoring and care. Filters need to be replaced, power usage must be tracked, and readings should be documented daily. These details prove that you’re managing the loss responsibly rather than simply setting up equipment and leaving it.
Protecting floors and plugging sinks
Even in areas that aren’t directly affected by water, small protective steps make a difference. Floor coverings prevent scratches from equipment, and installing drain plugs to detached plumbing components will stop odours and potential backflow. Adding these line items shows foresight and reduces the chance of secondary damage.
Accurate complementary items aren’t padding. They reflect the real scope of work and ensures compensation for work completed, including protecting the jobsite and looking out for the health and safety of workers and occupants.
Step 5: Link Your Documentation
Attach 360° captures, scope notes, and measurements for every line item. That level of transparency builds trust with carriers and shortens review times.
Common Errors in Water Damage Estimates
Even minor oversights can delay payment or lead to revision requests. Here’s what to look out for and how to avoid it.
Missing complementary items
This is the most common mistake among new estimators. Tasks such as capping water lines or removing debris after demolition are often overlooked. Review your scope line by line to make sure all related work is included.
Misidentifying materials
Mistaking MDF for pine or laminate for hardwood can cause significant price differences. Always confirm material types on-site and include them in your notes. It avoids confusion and keeps your estimate consistent with field conditions.
Not recording on-site details
Images don’t capture everything you need. Take note of measurements, material thickness, and finish types while you’re on-site. These small details support your pricing later and demonstrate that your scope is based on real conditions, not assumptions.
Using the wrong regional price list
Xactimate doesn’t automatically select the correct region, so it’s worth checking before exporting. Using the wrong list can make your estimate appear inflated or underpriced, which often leads to delays during the review process.
Over-drying wood floors or exceeding allowed time
Specialty drying takes skill and close monitoring. Track moisture levels carefully and stop once progress levels off. Carriers only pay for the approved drying period, so this attention protects both your results and your revenue.
Removing cabinetry without approval
Always confirm approval before removing items that may be costly to replace. It prevents disputes and shows you’re working in step with the claim process.
Omitting access or protection items in unaffected rooms
Access and protection are part of good site care. Add protective measures such as temporary floor coverings or door barriers, even in dry rooms. These steps prevent secondary damage and show that your team took care around the property. Homeowners are often especially sensitive after a loss, so documenting that you kept all areas well-maintained, clean, and free from scratches helps avoid misunderstandings later.
Ignoring carrier rules for after-hours or weekend work
Program carriers often define their own “after-hours” windows. If you bill outside those limits, your charges might be questioned. Know each carrier’s policy and note exceptions directly in your estimate.
Strong estimates come down to detail. When every task, measurement, and material is backed by evidence, you reduce questions, speed up approvals, and build trust on every job.
How DocuSketch Simplifies the Water Damage Estimating Process
1. 360° Capture for Instant, Defensible Documentation
DocuSketch’s 360° documentation gives you verifiable proof of a property’s condition from day one. Every surface, fixture, and affected area is thoroughly documented, creating a clear record that helps prevent disputes about pre-existing damage.
You can revisit the job virtually at any time to check materials, confirm measurements, or track progress. For contractors, that means fewer missed details. For carriers, it provides immediate visibility into the loss without requiring additional photos or site notes.
2. Sketch Creation (If Contractor Chooses)
DocuSketch automatically generates detailed floor plans from your 360° documentation, integrating seamlessly with Xactimate and Symbility so every dimension matches the real property layout.
It saves hours of manual measuring and rework while keeping documentation and line items perfectly in sync. From a single-room leak to a full-property flood, every estimate is based on reliable, verifiable measurements that carriers can trust.
3. Full Estimating (Using DocuSketch Estimating)
With DocuSketch Estimating, you can collaborate with experienced estimators who review your scope and refine it before submission. They’ll identify complementary items that might have been missed and check that pricing and codes match your region.
The process is hands-on and collaborative. You’ll get real-time feedback, learn how each line item connects, and become more confident with every project.
If you want to get extra support on your estimate review process, try our free Estimate Grader. It will provide an estimate review to catch costly mistakes, improve accuracy, and help you write more consistent, compliant estimates in under 10 minutes.
4. Faster Approvals and Fewer Disputes
When your documentation, sketches, and pricing line up, approvals follow quickly. Adjusters can see exactly what you saw on-site, reducing the need for questions, emails, and revisions. That transparency speeds up payment and strengthens trust with both carriers and homeowners.
The difference between a good estimate and a great one often comes down to documentation. When every room, material, and action is backed by clear evidence, you can stand behind your work with confidence, and carriers recognize that.
DocuSketch provides that clarity from the very start. Whether you’re capturing the loss, building your sketch, or finalizing your estimate, the platform helps you work faster, document smarter, and maintain accuracy without cutting corners.
Start your next estimate using DocuSketch today. Book a demo to see how it can streamline your process.
Learn more about building accurate estimates:

Related Articles


%20(1).jpg)