Considerations for Conducting Mold Inspection Reports

5 min read
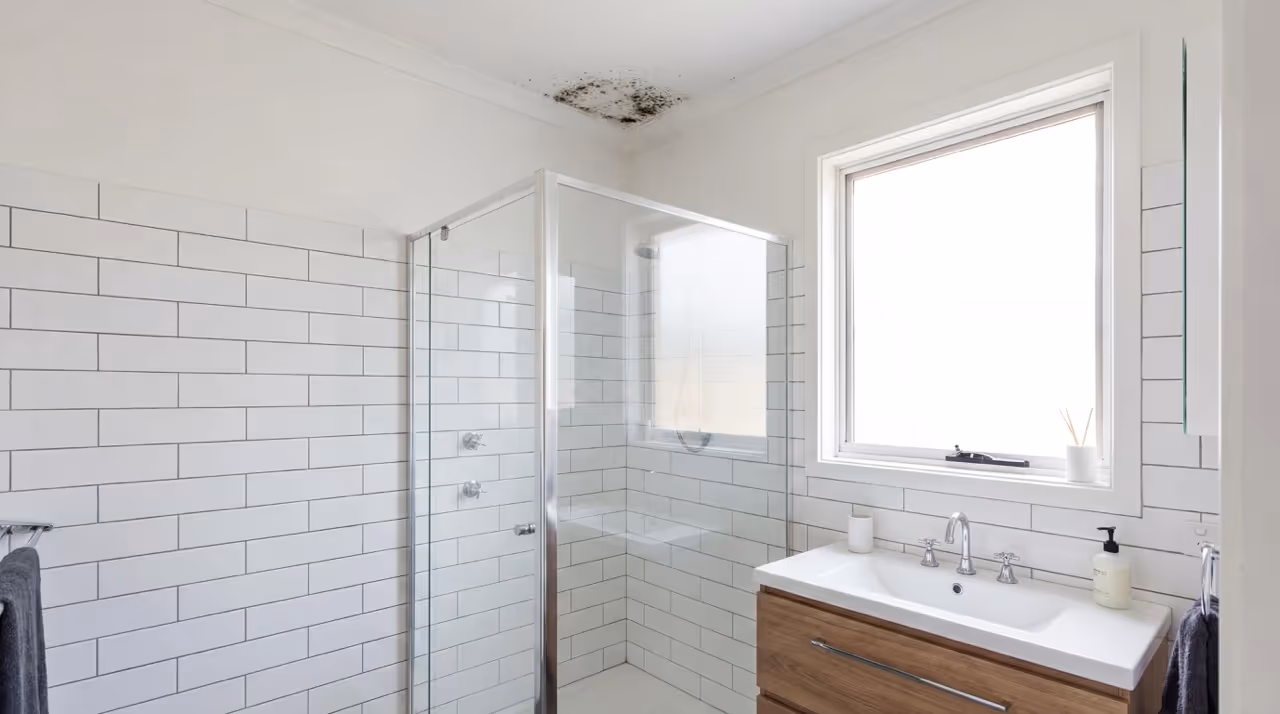
Every mold job starts with a clue. It might be dark spotting on a bathroom ceiling, condensation building on windows, or a musty smell no one can quite place. And sometimes it’s a home inspector flagging discoloration in an attic, which delays a real estate sale until someone takes a closer look.
A mold inspection report helps you capture that story clearly. It guides you through what the customer noticed, what you observed on-site, and what the building conditions suggest. For contractors, this is a visual and non-intrusive inspection. You’re not identifying mold species or carrying out lab tests. You’re documenting what you can see, measure, and confidently report.
A consistent report makes the next steps easier for the customer, the carrier, and the industrial hygienist who may need to write a protocol. It protects your team, sets expectations, and helps create a defensible remediation plan.
This guide reflects my experience in the field, but mold regulations can vary. Always follow your local laws, standards, and licensing requirements when inspecting or handling mold.
What Is a Mold Inspection Report?
A mold inspection report is a structured document used to record findings during a visual mold inspection. It brings consistency to every walkthrough, whether it’s a simple bathroom moisture issue or a larger job tied to a property sale.
A strong report captures:
- What the customer reported, such as musty odors, spotting, or condensation that keeps returning on windows
- What you observed on-site, including staining, fuzzy growth, ventilation habits, or signs of past leaks
- Temperature, relative humidity, and moisture readings that help explain why the problem developed
- Clear photo documentation or 360° scans of every room, including clean areas, which may help with adjuster questions later, show pre-existing damage, and help with potential supplements or change orders
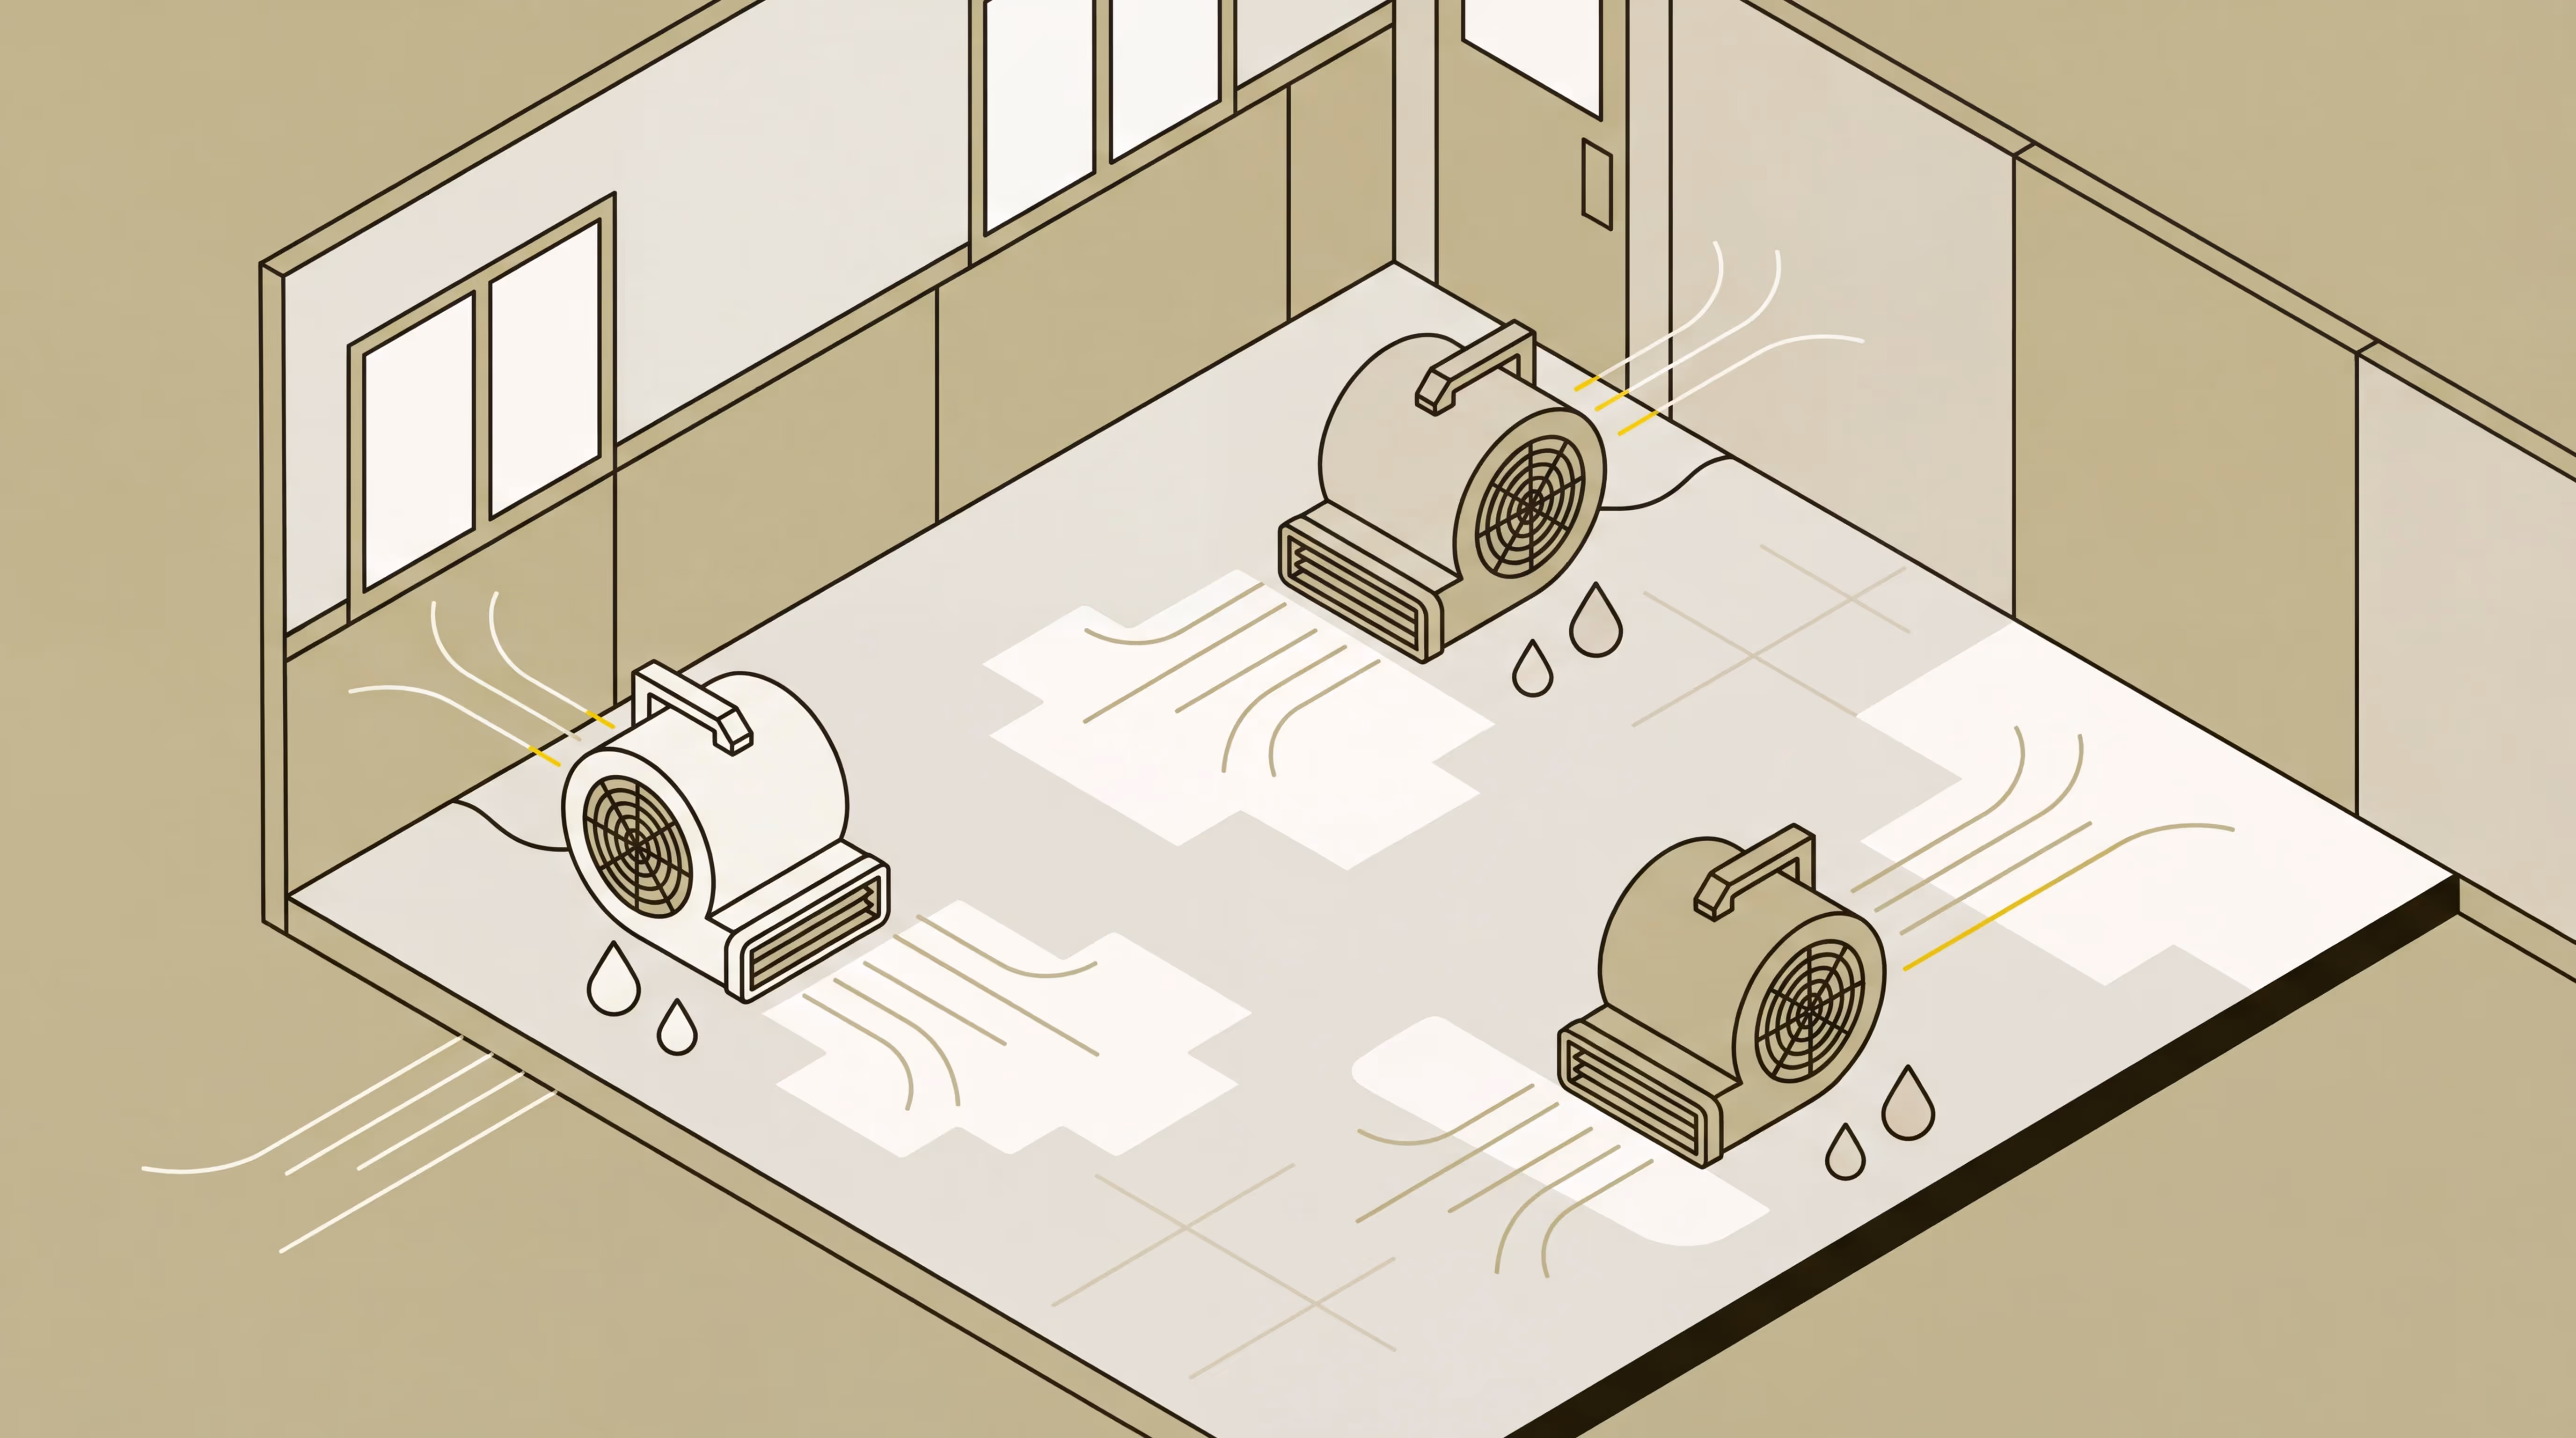
Mold growth comes down to two factors. It needs a food source, and it needs moisture. Drywall, carpet, and wood can feed it. Glass and metal can’t. If I see mold on a window, it’s usually growing on dust or dirt on the surface because of condensation and ventilation problems. These cues help you understand what’s really happening rather than chasing surface symptoms.
Where Inspections Fit into the Mold Remediation Process
The inspection report is the very first step in the remediation process. A customer calls with a concern, you arrive on-site, and you start documenting what you can see and measure.
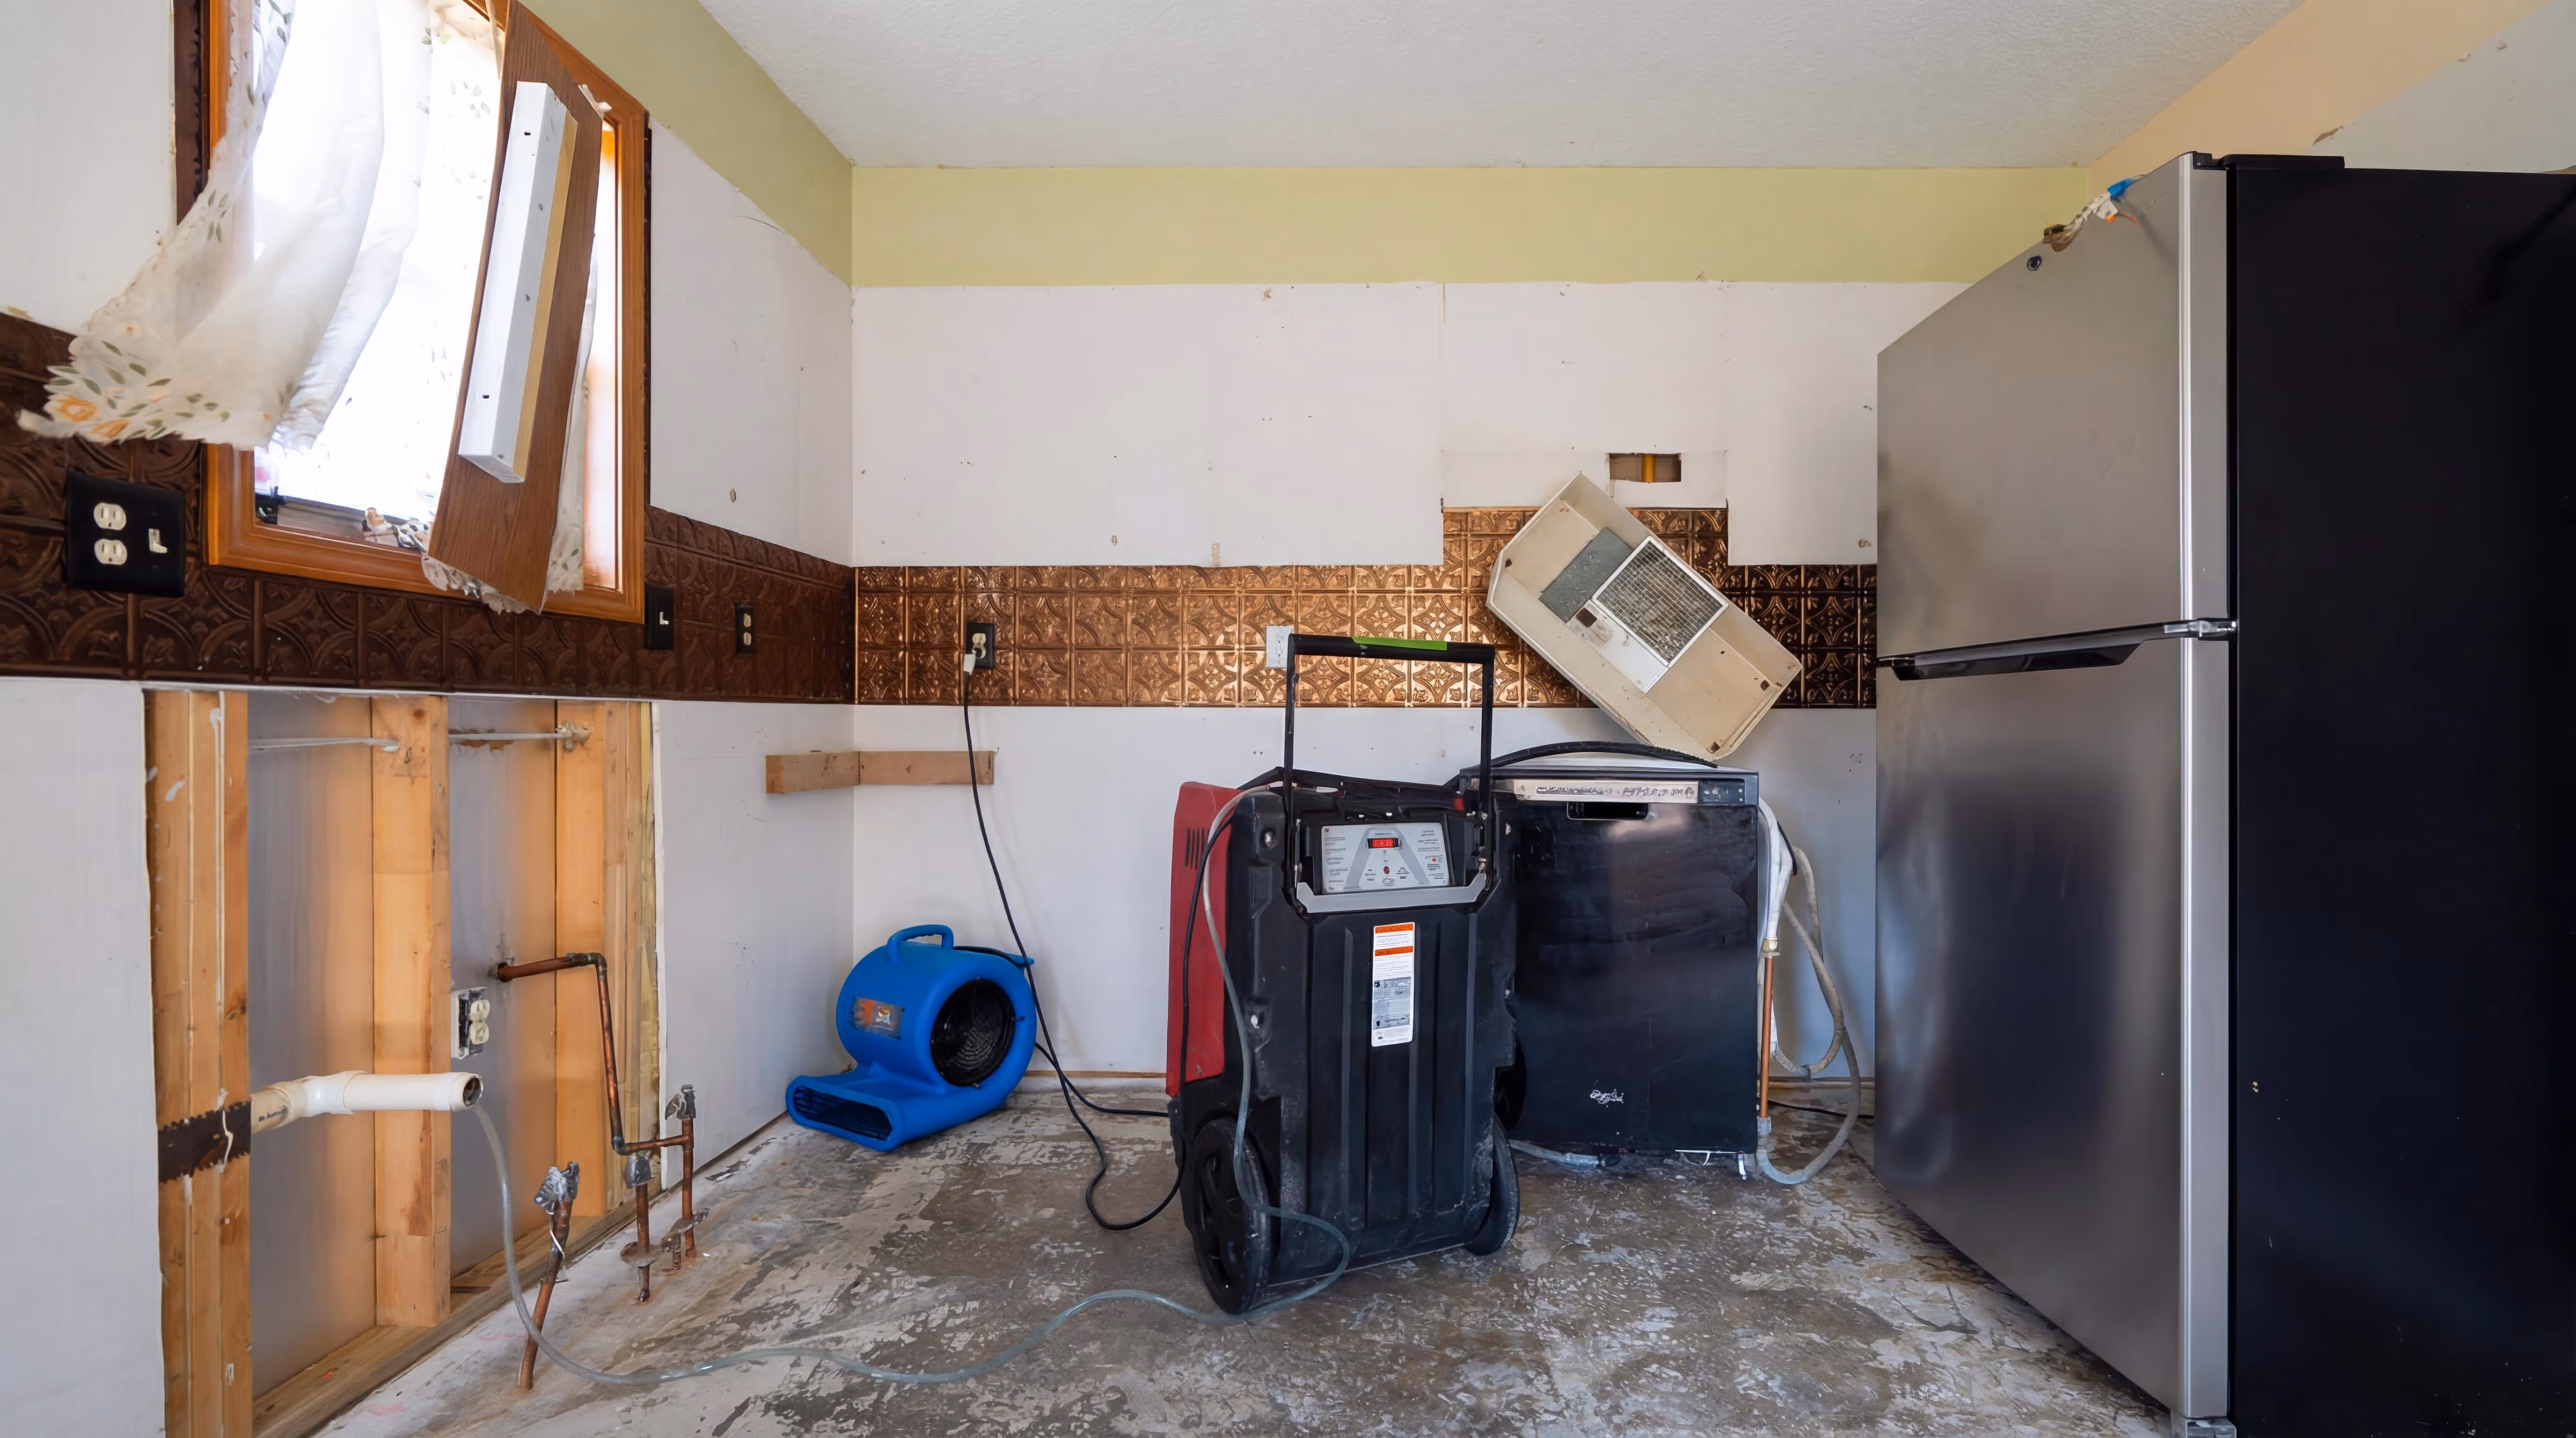
Some issues are straightforward. A bathroom fan that isn’t used will leave moisture sitting on the ceiling. A cold window with high indoor humidity will collect condensation, which can lead to surface growth. Other situations take a bit more digging. A strong, musty smell with no visible growth usually indicates off-gassing from something feeding off of hidden moisture. Off-gassing is simply the musty odor mold gives off when it’s growing out of sight, often behind drywall or under flooring.
This is where an industrial hygienist comes in. They can perform sampling when needed and write the remediation protocol. I often compare it to construction. You wouldn’t start building a house without an engineer’s plan. In the same way, all mold jobs should follow a hygienist’s protocol to avoid risk and guide proper source removal.
Your inspection gives the hygienist context and helps the customer understand what the next steps might involve.
Why Standardized Documentation Matters
Good documentation builds trust, keeps everyone aligned, and protects you.
- It keeps your inspection grounded in what you’re actually there to do.
A visual inspection means you’re only looking at what you can see without opening walls or moving materials. Disturbing mold without containment spreads spores quickly. You can think of it like a dandelion. Once you blow on it, the seeds spread. - It helps customers understand the situation.
Many people believe mold can be sprayed away. Others underestimate the role of moisture. A clear report helps explain why ventilation, humidity, and source removal matter more than surface cleaning. - It supports adjusters and hygienists.
Organized notes, readings, and photos help adjusters make decisions faster. Hygienists can also use your report as part of the case history.
What’s Included in a Mold Inspection Report?
Here are the sections covered in a mold inspection report, shaped by what I often see on-site.
1. Client and Property Information
This section covers the essentials you need before you start the walkthrough.
Record the occupant’s details, address, inspection date, and your own credentials. If the person calling is a renter, make sure that’s clear. Renters can report smells or spotting, but they can’t authorize intrusive work. Without the owner's approval, the inspection must remain strictly visual.
2. Inspection Scope and Limitations
This helps you set the right expectations and stay within the limits of a visual inspection.
If the job ever requires opening walls or removing materials, you’ll need written authorization from the homeowner or whoever is responsible for approving work on the property. I recommend noting out-of-reach areas, whether that’s behind cabinetry, inside sealed cavities, or spots that aren’t safe to enter.
If a customer asks for “a quick look behind the wall,” explain why that can’t happen without containment and PPE. Make sure to document that conversation. It matters later if they decide to tear something open themselves.
3. Occupant Complaints and Initial Concerns
Document why the customer called and what they noticed.
Common examples:
- Musty odor in a bedroom
- Dark spots on a bathroom ceiling
- Condensation forming on windows
- A home inspector flagging discoloration in the attic
If the customer has already used store-bought cleaners, make a note of it. These products can lighten the stain but don’t solve the moisture problem underneath, so it changes what you’re able to see during the walkthrough.
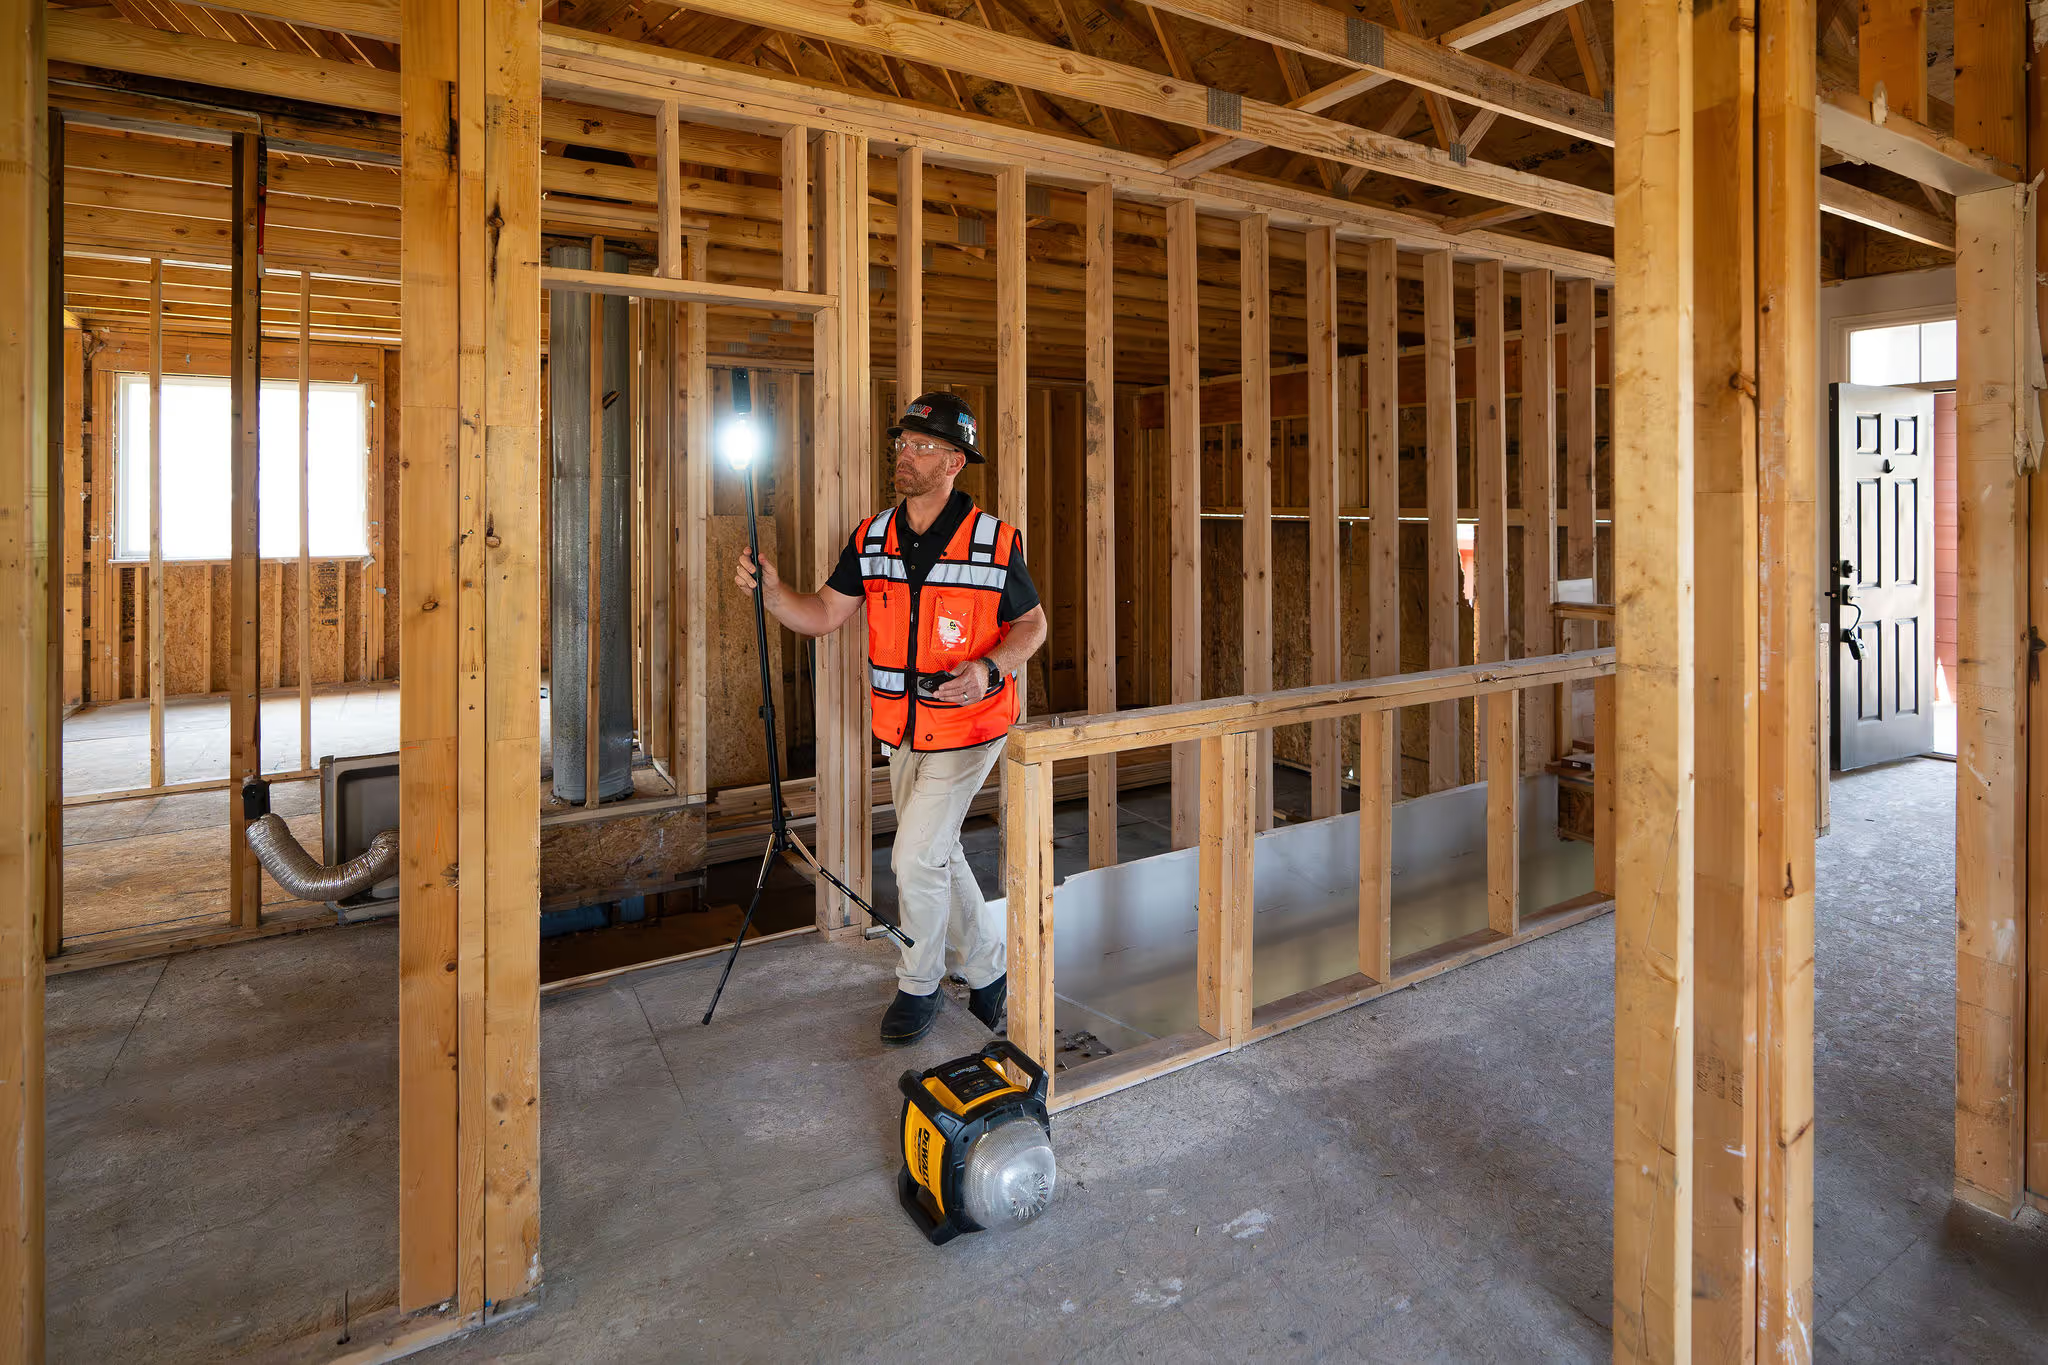
4. Room-by-Room Observations
This is where the inspection really takes shape. Move through each room in the same order and start by noting the general conditions before recording any visible growth, moisture clues, or odors.
Examples I see often:
- Windows: Surface mold usually points to condensation from high humidity or poor airflow.
- Bathrooms: Spotting on ceilings or walls often comes from fans that aren’t used during showers.
- Attics: Discoloration can indicate long-term moisture from ventilation issues or roof leaks.
- Bedrooms: A musty smell with no visible growth often means hidden moisture behind walls or under flooring.
5. Environmental Readings
I record moisture readings, temperature, and relative humidity.
For example, a home sitting at 70°F with 70% relative humidity will almost always have condensation forming on cooler surfaces. Even if the materials are dry when inspected, moisture may have been present earlier or may return as the weather changes.
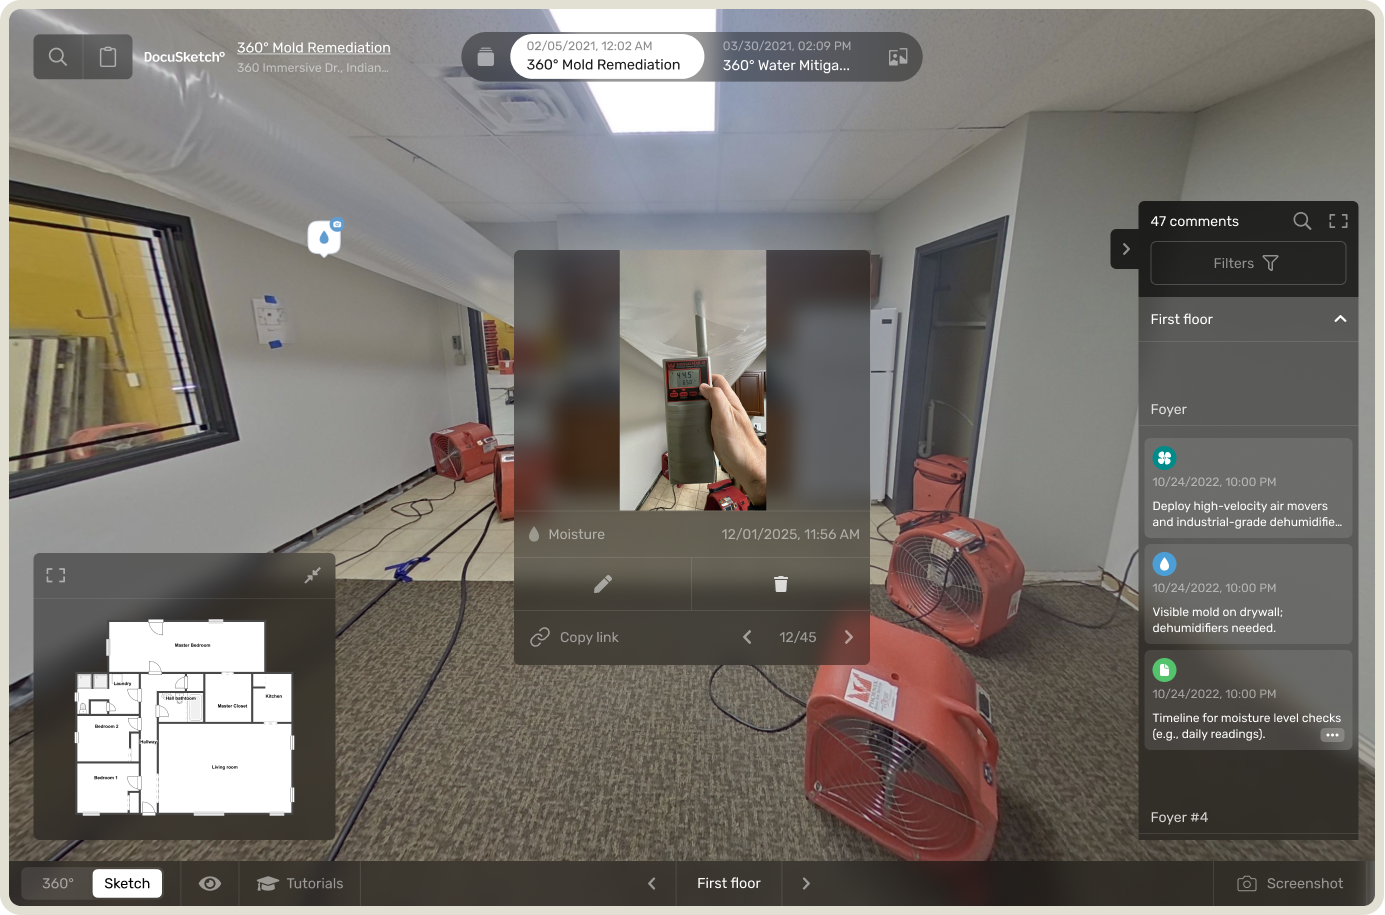
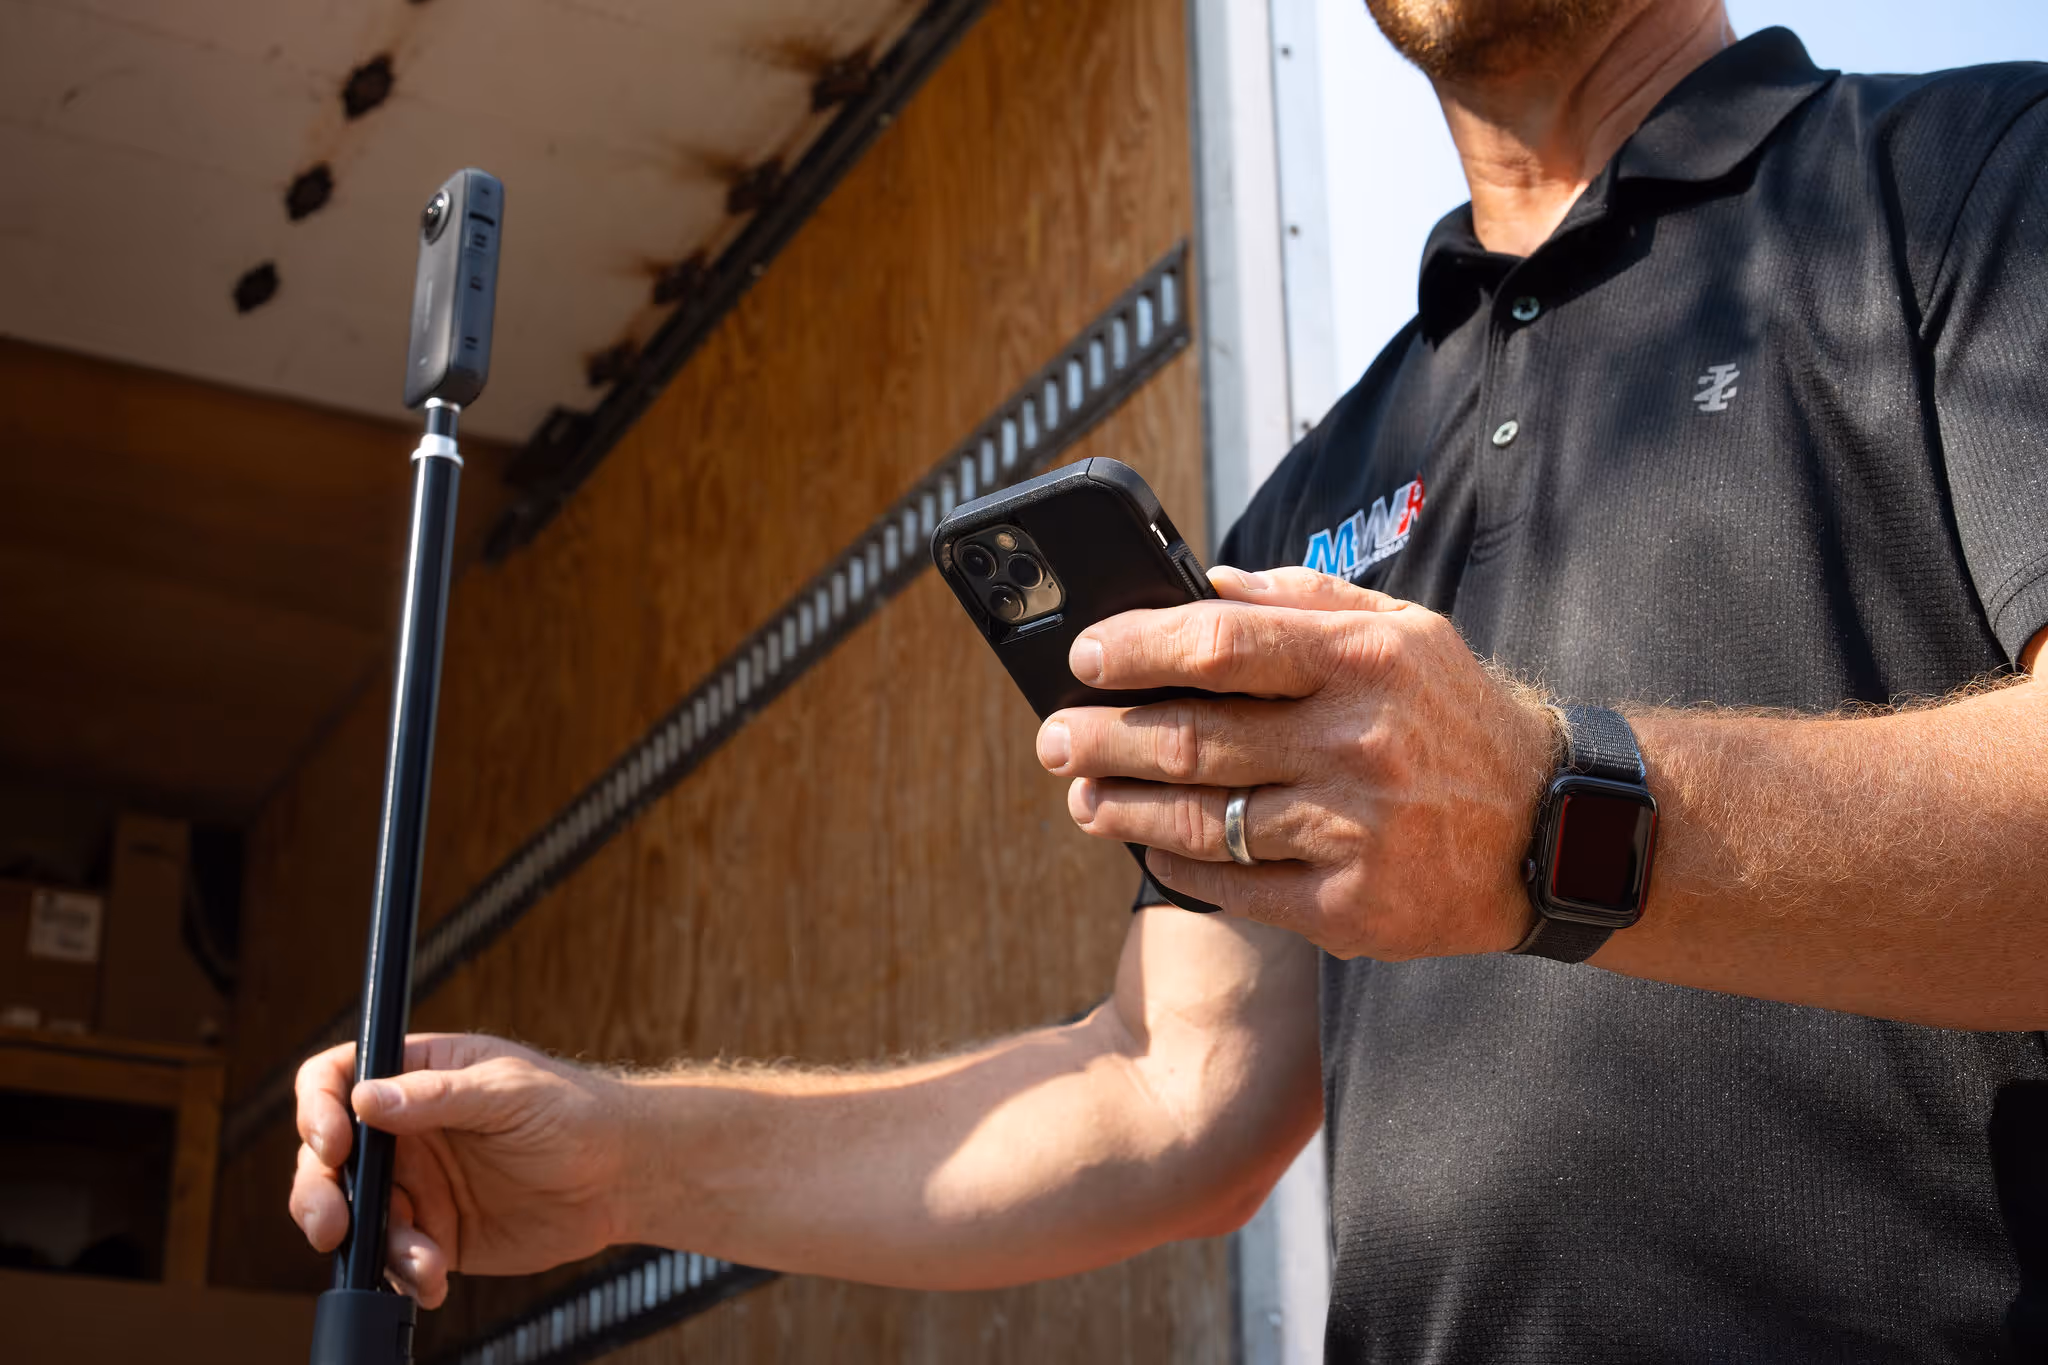
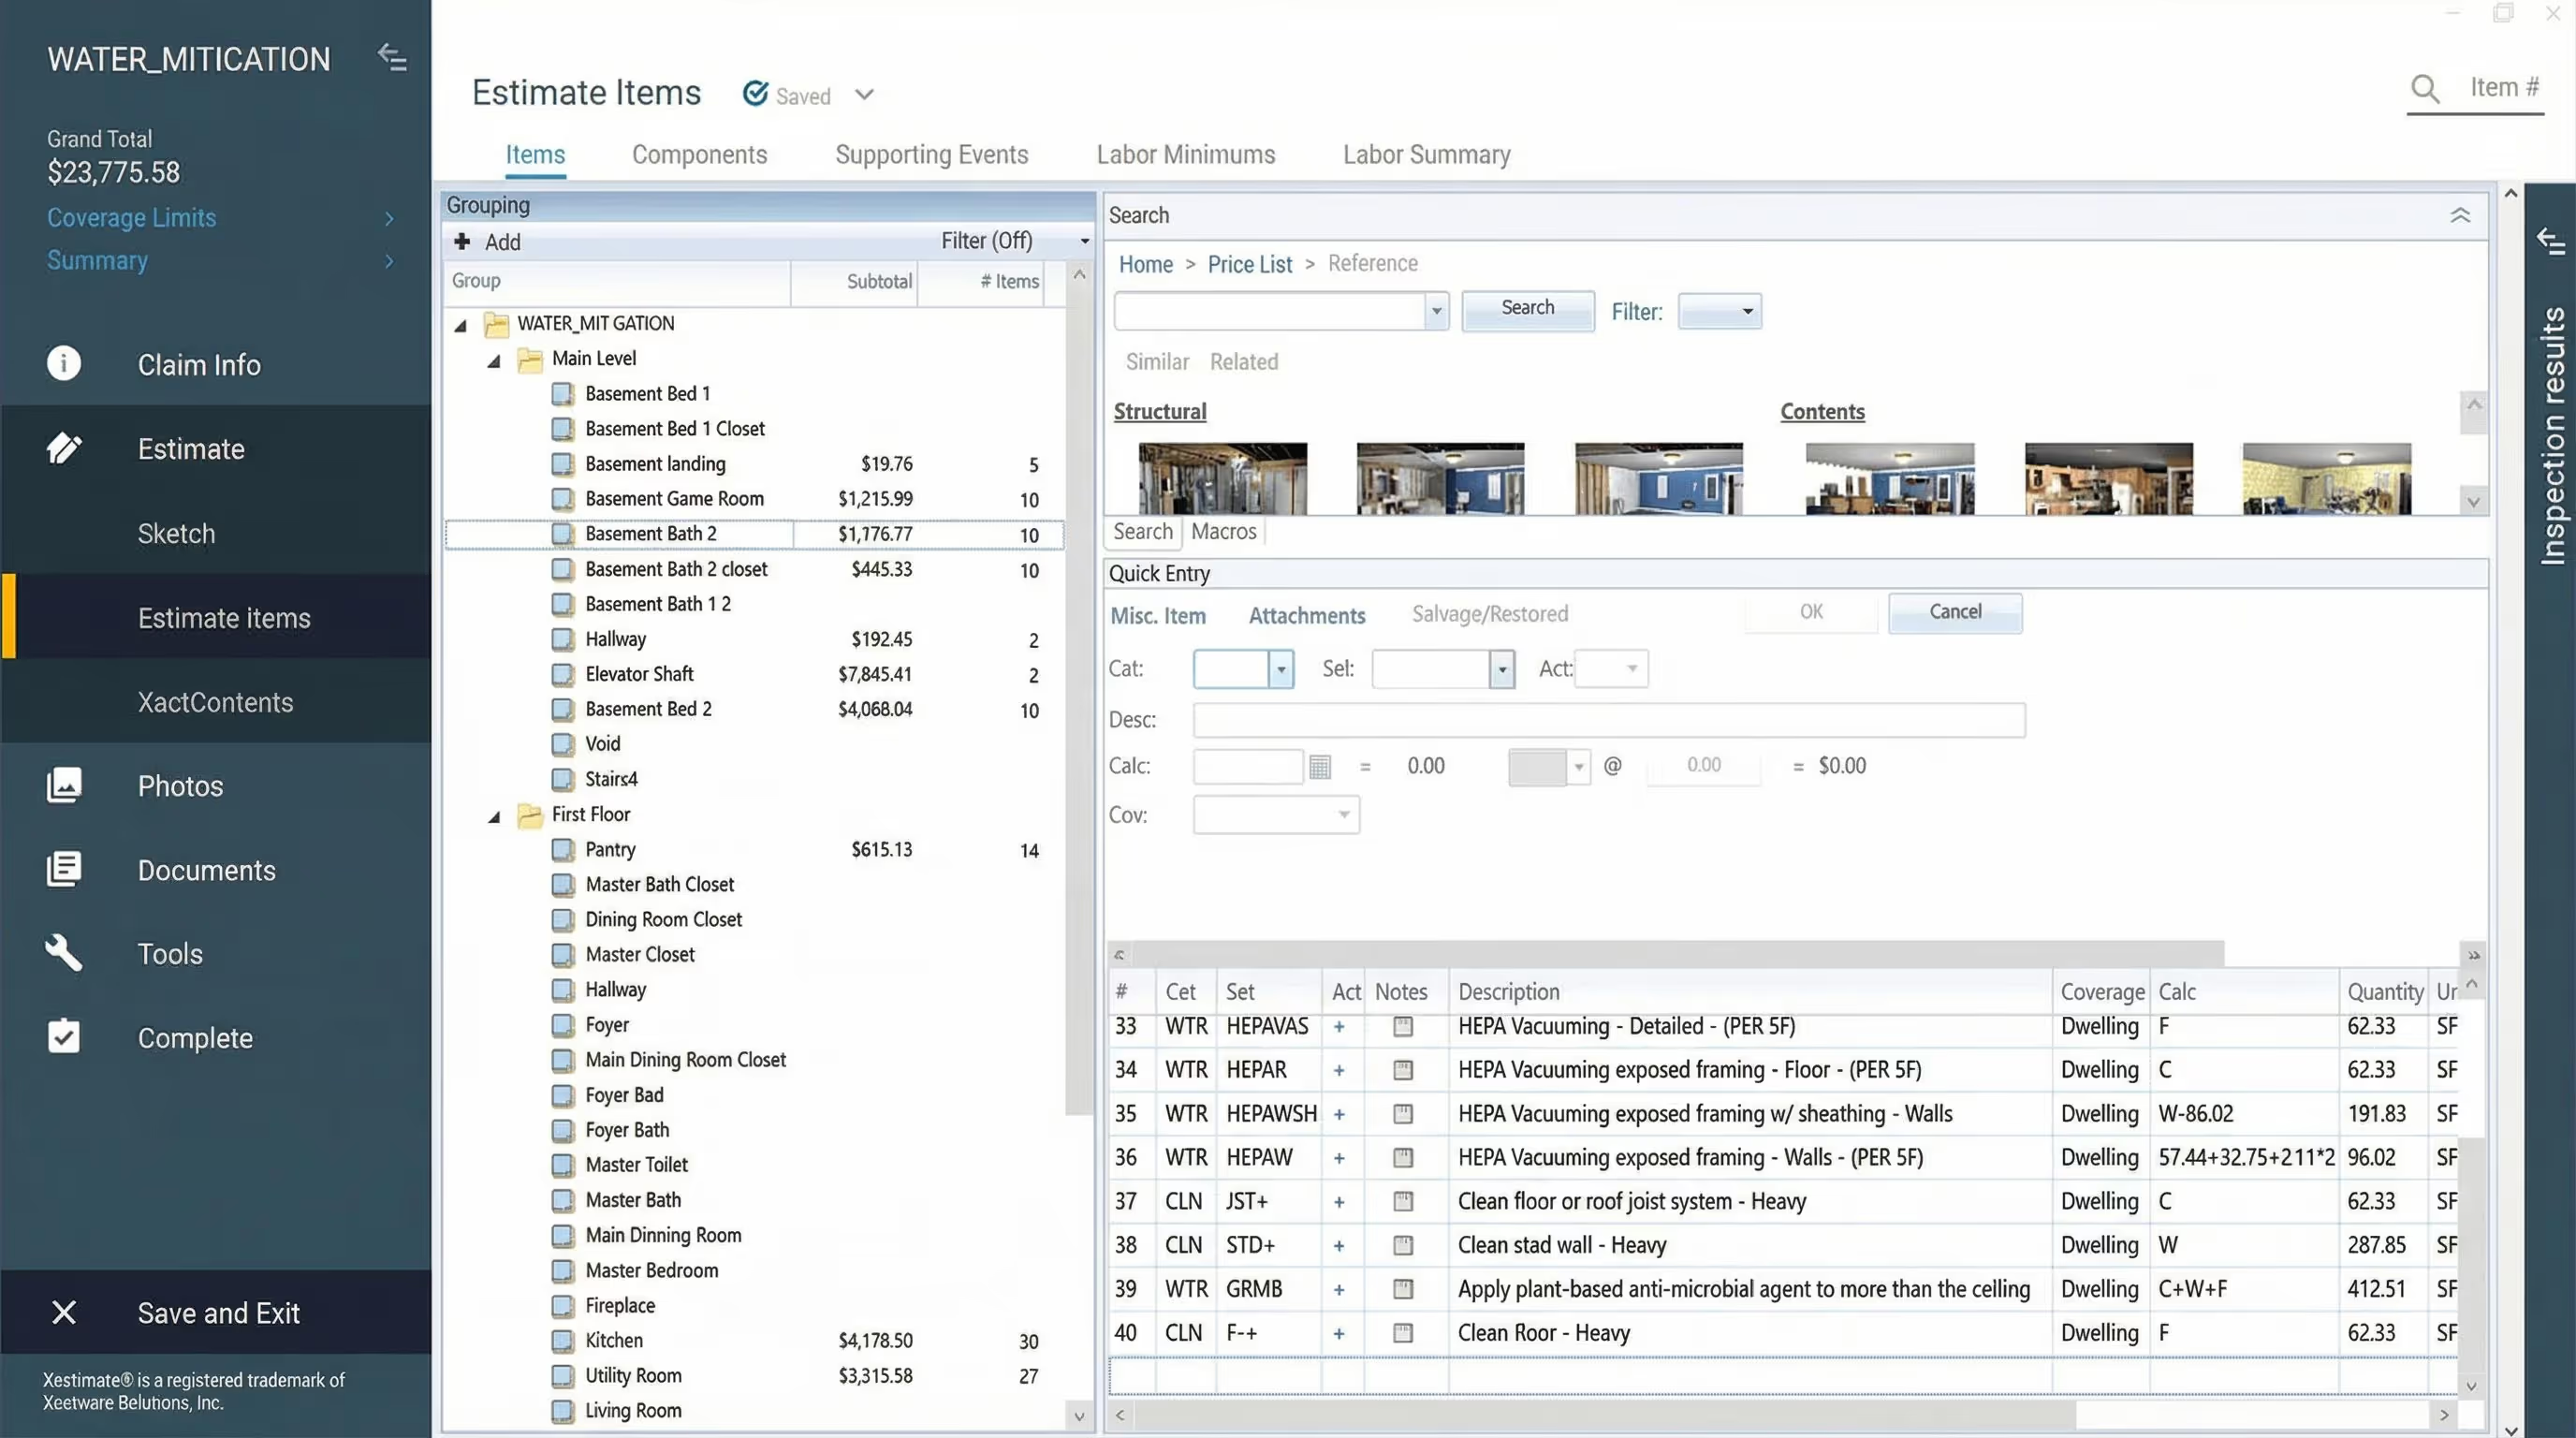
6. Photos and 360° Documentation
Photos and scans are essential and should include:
- Thorough visual documentation, such as 360° scans of every room
- Comments with specific issues and context
- Photos of meter readings, including temperature and humidity readings
- Photos of unaffected rooms
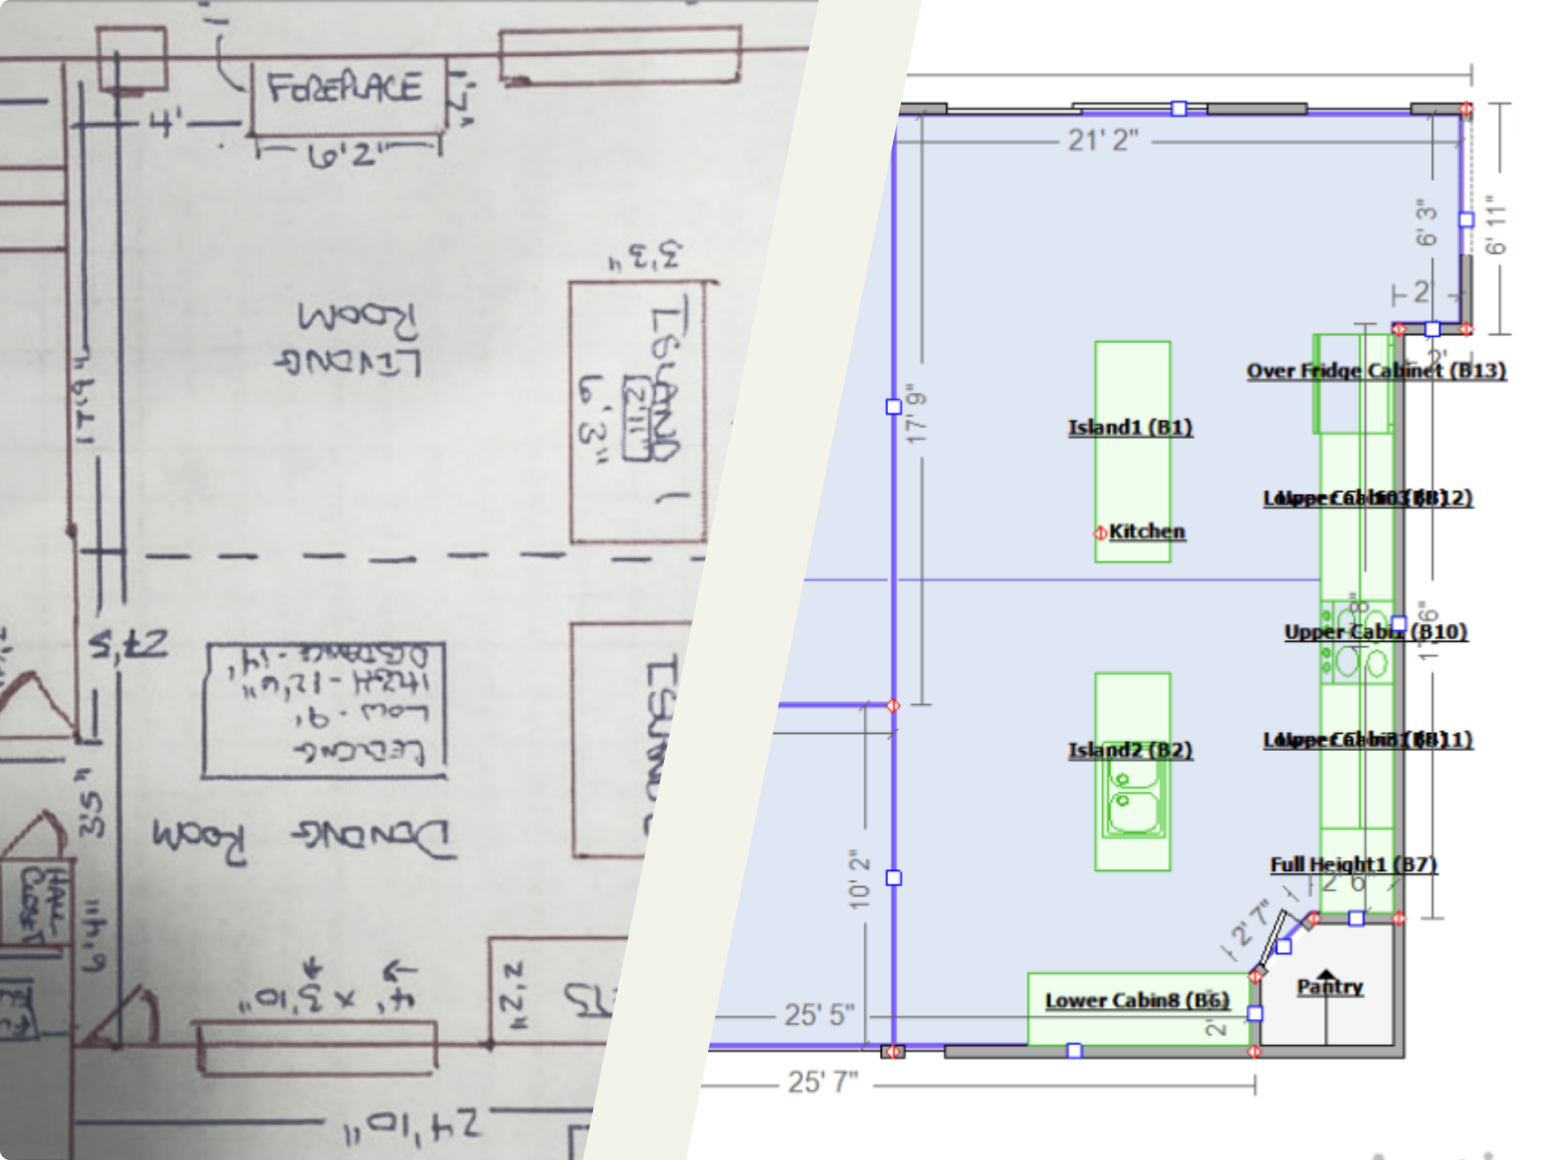
Room labels in DocuSketch help keep everything consistent. I’ve seen teams take multiple sets of photos, but the 360° capture can replace most of that work with less time. It keeps documentation in one place with the ability to leave notes as you conduct your inspection.
7. Testing and Lab Data
This section is only for third-party results.
Contractors shouldn’t perform sampling. In most areas, doing your own sampling creates a conflict of interest, since the test results can affect the scope of the remediation work you might be asked to do.
When the hygienist completes testing, their report may include:
- Air sample results
- Tape or swab results
- Indoor versus outdoor comparisons
Add a clear note stating you didn’t perform the testing yourself. This keeps the documentation transparent about who did what and prevents any misunderstanding about your role in the findings.
8. Preliminary Recommendations
This section outlines what should happen next.
Examples include:
- Improving ventilation
- Fixing leaks
- Recommending a hygienist
- Highlighting safety considerations if intrusive work becomes necessary
Customers sometimes want to tear things out to “see what’s behind it.” I make sure the report shows that I advised against it. Disturbing mold without containment spreads it quickly.
9. Inspector Notes, Disclaimers, and Signature
This section captures all remaining context. I might note if:
- A renter made the report, but the landlord hasn’t approved work
- The customer cleaned the area before I arrived
- Odor was strongest along a particular wall
- Access was limited due to stored items
I make it clear that the findings reflect a visual inspection at the time of the visit. I sign the report and have the customer sign it so there’s a shared record of what was reviewed.
How to Fill Out a Mold Inspection Report
A strong inspection is clear, consistent, and defensible. However, that was a lot to go through, so here’s a short recap of the key points.
What to Document During a Walkthrough
Start with why you were called. Confirm who can authorize work. Then move room-by-room.
Include:
- 360° scans
- Comments on images
- Photos of readings, such as moisture, temperature, or humidity
- Notes on ventilation habits
- Observations about access
How to Organize Observations
Use consistent room labels. Keep observations factual. If something looks suspicious but isn’t confirmed, note it as evidence rather than a conclusion.
Best Practices
- Stay within the limits of a visual inspection
- Avoid intrusive work without written approval
- If intrusive work becomes necessary and you have approval from the owner, make sure containment and PPE are in place so you don’t release spores into clean rooms.
- Document limitations clearly
- Recommend a hygienist when conditions point to hidden growth
Common Errors to Avoid with Mold Inspection Reports
Relying on thermal imaging alone
Thermal cameras are helpful, but they only show temperature differences, not moisture itself. A cold spot on a wall doesn’t always mean there’s water behind it, and warm areas can hide moisture too. I always confirm suspicious areas with a moisture meter so the customer and the adjuster can trust the readings.
Treating bleaching products as remediation
Bleach and over-the-counter “mold remover” sprays often lighten the stain but don’t fix the moisture problem underneath. I see this a lot when customers try to clean surfaces before I arrive. It’s important to document this because the stain may look different than it did initially, and the root cause still needs to be addressed.
Performing your own sampling when it creates a conflict of interest
Sampling can create a conflict of interest if you then want to complete the remediation work. Keeping testing with a third party makes the documentation cleaner, more transparent, and easier for adjusters to review.
Under-explaining the limits of a visual inspection
A visual inspection only covers what you can see and measure without opening walls or removing materials. If parts of a room were blocked, if a ceiling couldn’t be accessed, or if cabinetry prevented a full view, I make sure that’s documented. It protects you later and helps the hygienist understand what might need a closer look.
Not warning customers about disturbing materials
Customers are often tempted to “take a quick peek” behind baseboards or drywall. I always explain why this isn’t safe without containment. Disturbing mold can release spores into clean areas and make the situation worse. Adding a short note about this conversation shows that you clearly communicated the risks and kept the inspection within its proper scope.
When to Use a Mold Inspection Report and When to Start Remediation
A mold inspection report is always the first step. It documents what you saw during a visual walkthrough, the conditions inside the building, and any clues indicating a moisture problem. In many cases, this report is all the customer needs to understand what’s happening and what habits or minor repairs will help.
Where the hygienist fits in
A hygienist performs sampling when necessary and writes the remediation protocol. Their role is important because contractors shouldn’t sample themselves and shouldn’t diagnose species or hidden sources without scientific testing. On larger or higher-risk jobs, the protocol protects you, the homeowner, and the adjuster by clearly outlining the scope of work.
How your inspection supports the remediation
Your inspection report sets the stage for everything that comes next. It helps the hygienist understand what you saw, provides the adjuster with a clear record of the conditions, and helps the homeowner understand why additional steps may be required before cleanup begins.
How DocuSketch Can Simplify the Mold Inspection Process
Eliminates Redundant Photo Work
Each 360° scan generates multiple cubic images, so technicians don’t need to repeat the walkthrough with their phone. I’ve seen this save 15 to 30 minutes per site visit and reduce missed details.
Creates Clear, Room-by-Room Photo Reports
The Generate Report feature produces a PDF with room labels, comment images, and optional floor plans. Adjusters can open it even if they don’t have access to the complete 360° walkthrough of the property.
Learn more:
https://www.docusketch.com/solutions/mold-remediation-software
Supports Hygienists and Adjusters
Hygienists use your documentation to understand what you saw on-site. Adjusters can review clearly labeled photos without asking for more.
Improves Consistency Across Your Team
Label a room once, and every image inherits the label. This keeps documentation consistent even when technicians change.
Makes Ongoing Monitoring Simple
Additional 360° scans create a clear timeline that supports billing, progress tracking, and final documentation.
Start Your Next Mold Inspection With a Clear Plan
A well-structured mold inspection report helps you explain what you saw, what it means, and what needs to happen next. With a consistent template and complete documentation, your inspections become clearer, faster, and more defensible.
Clear documentation makes mold work easier for everyone. If you’d like to see how DocuSketch can help your team capture accurate, room-by-room records in minutes, you can book a demo today.
Every mold job starts with a clue. It might be dark spotting on a bathroom ceiling, condensation building on windows, or a musty smell no one can quite place. And sometimes it’s a home inspector flagging discoloration in an attic, which delays a real estate sale until someone takes a closer look.
A mold inspection report helps you capture that story clearly. It guides you through what the customer noticed, what you observed on-site, and what the building conditions suggest. For contractors, this is a visual and non-intrusive inspection. You’re not identifying mold species or carrying out lab tests. You’re documenting what you can see, measure, and confidently report.
A consistent report makes the next steps easier for the customer, the carrier, and the industrial hygienist who may need to write a protocol. It protects your team, sets expectations, and helps create a defensible remediation plan.
This guide reflects my experience in the field, but mold regulations can vary. Always follow your local laws, standards, and licensing requirements when inspecting or handling mold.
What Is a Mold Inspection Report?
A mold inspection report is a structured document used to record findings during a visual mold inspection. It brings consistency to every walkthrough, whether it’s a simple bathroom moisture issue or a larger job tied to a property sale.
A strong report captures:
- What the customer reported, such as musty odors, spotting, or condensation that keeps returning on windows
- What you observed on-site, including staining, fuzzy growth, ventilation habits, or signs of past leaks
- Temperature, relative humidity, and moisture readings that help explain why the problem developed
- Clear photo documentation or 360° scans of every room, including clean areas, which may help with adjuster questions later, show pre-existing damage, and help with potential supplements or change orders
Mold growth comes down to two factors. It needs a food source, and it needs moisture. Drywall, carpet, and wood can feed it. Glass and metal can’t. If I see mold on a window, it’s usually growing on dust or dirt on the surface because of condensation and ventilation problems. These cues help you understand what’s really happening rather than chasing surface symptoms.
Where Inspections Fit into the Mold Remediation Process
The inspection report is the very first step in the remediation process. A customer calls with a concern, you arrive on-site, and you start documenting what you can see and measure.
Some issues are straightforward. A bathroom fan that isn’t used will leave moisture sitting on the ceiling. A cold window with high indoor humidity will collect condensation, which can lead to surface growth. Other situations take a bit more digging. A strong, musty smell with no visible growth usually indicates off-gassing from something feeding off of hidden moisture. Off-gassing is simply the musty odor mold gives off when it’s growing out of sight, often behind drywall or under flooring.
This is where an industrial hygienist comes in. They can perform sampling when needed and write the remediation protocol. I often compare it to construction. You wouldn’t start building a house without an engineer’s plan. In the same way, all mold jobs should follow a hygienist’s protocol to avoid risk and guide proper source removal.
Your inspection gives the hygienist context and helps the customer understand what the next steps might involve.
Why Standardized Documentation Matters
Good documentation builds trust, keeps everyone aligned, and protects you.
- It keeps your inspection grounded in what you’re actually there to do.
A visual inspection means you’re only looking at what you can see without opening walls or moving materials. Disturbing mold without containment spreads spores quickly. You can think of it like a dandelion. Once you blow on it, the seeds spread. - It helps customers understand the situation.
Many people believe mold can be sprayed away. Others underestimate the role of moisture. A clear report helps explain why ventilation, humidity, and source removal matter more than surface cleaning. - It supports adjusters and hygienists.
Organized notes, readings, and photos help adjusters make decisions faster. Hygienists can also use your report as part of the case history.
What’s Included in a Mold Inspection Report?
Here are the sections covered in a mold inspection report, shaped by what I often see on-site.
1. Client and Property Information
This section covers the essentials you need before you start the walkthrough.
Record the occupant’s details, address, inspection date, and your own credentials. If the person calling is a renter, make sure that’s clear. Renters can report smells or spotting, but they can’t authorize intrusive work. Without the owner's approval, the inspection must remain strictly visual.
2. Inspection Scope and Limitations
This helps you set the right expectations and stay within the limits of a visual inspection.
If the job ever requires opening walls or removing materials, you’ll need written authorization from the homeowner or whoever is responsible for approving work on the property. I recommend noting out-of-reach areas, whether that’s behind cabinetry, inside sealed cavities, or spots that aren’t safe to enter.
If a customer asks for “a quick look behind the wall,” explain why that can’t happen without containment and PPE. Make sure to document that conversation. It matters later if they decide to tear something open themselves.
3. Occupant Complaints and Initial Concerns
Document why the customer called and what they noticed.
Common examples:
- Musty odor in a bedroom
- Dark spots on a bathroom ceiling
- Condensation forming on windows
- A home inspector flagging discoloration in the attic
If the customer has already used store-bought cleaners, make a note of it. These products can lighten the stain but don’t solve the moisture problem underneath, so it changes what you’re able to see during the walkthrough.
4. Room-by-Room Observations
This is where the inspection really takes shape. Move through each room in the same order and start by noting the general conditions before recording any visible growth, moisture clues, or odors.
Examples I see often:
- Windows: Surface mold usually points to condensation from high humidity or poor airflow.
- Bathrooms: Spotting on ceilings or walls often comes from fans that aren’t used during showers.
- Attics: Discoloration can indicate long-term moisture from ventilation issues or roof leaks.
- Bedrooms: A musty smell with no visible growth often means hidden moisture behind walls or under flooring.
5. Environmental Readings
I record moisture readings, temperature, and relative humidity.
For example, a home sitting at 70°F with 70% relative humidity will almost always have condensation forming on cooler surfaces. Even if the materials are dry when inspected, moisture may have been present earlier or may return as the weather changes.
6. Photos and 360° Documentation
Photos and scans are essential and should include:
- Thorough visual documentation, such as 360° scans of every room
- Comments with specific issues and context
- Photos of meter readings, including temperature and humidity readings
- Photos of unaffected rooms
Room labels in DocuSketch help keep everything consistent. I’ve seen teams take multiple sets of photos, but the 360° capture can replace most of that work with less time. It keeps documentation in one place with the ability to leave notes as you conduct your inspection.
7. Testing and Lab Data
This section is only for third-party results.
Contractors shouldn’t perform sampling. In most areas, doing your own sampling creates a conflict of interest, since the test results can affect the scope of the remediation work you might be asked to do.
When the hygienist completes testing, their report may include:
- Air sample results
- Tape or swab results
- Indoor versus outdoor comparisons
Add a clear note stating you didn’t perform the testing yourself. This keeps the documentation transparent about who did what and prevents any misunderstanding about your role in the findings.
8. Preliminary Recommendations
This section outlines what should happen next.
Examples include:
- Improving ventilation
- Fixing leaks
- Recommending a hygienist
- Highlighting safety considerations if intrusive work becomes necessary
Customers sometimes want to tear things out to “see what’s behind it.” I make sure the report shows that I advised against it. Disturbing mold without containment spreads it quickly.
9. Inspector Notes, Disclaimers, and Signature
This section captures all remaining context. I might note if:
- A renter made the report, but the landlord hasn’t approved work
- The customer cleaned the area before I arrived
- Odor was strongest along a particular wall
- Access was limited due to stored items
I make it clear that the findings reflect a visual inspection at the time of the visit. I sign the report and have the customer sign it so there’s a shared record of what was reviewed.
How to Fill Out a Mold Inspection Report
A strong inspection is clear, consistent, and defensible. However, that was a lot to go through, so here’s a short recap of the key points.
What to Document During a Walkthrough
Start with why you were called. Confirm who can authorize work. Then move room-by-room.
Include:
- 360° scans
- Comments on images
- Photos of readings, such as moisture, temperature, or humidity
- Notes on ventilation habits
- Observations about access
How to Organize Observations
Use consistent room labels. Keep observations factual. If something looks suspicious but isn’t confirmed, note it as evidence rather than a conclusion.
Best Practices
- Stay within the limits of a visual inspection
- Avoid intrusive work without written approval
- If intrusive work becomes necessary and you have approval from the owner, make sure containment and PPE are in place so you don’t release spores into clean rooms.
- Document limitations clearly
- Recommend a hygienist when conditions point to hidden growth
Common Errors to Avoid with Mold Inspection Reports
Relying on thermal imaging alone
Thermal cameras are helpful, but they only show temperature differences, not moisture itself. A cold spot on a wall doesn’t always mean there’s water behind it, and warm areas can hide moisture too. I always confirm suspicious areas with a moisture meter so the customer and the adjuster can trust the readings.
Treating bleaching products as remediation
Bleach and over-the-counter “mold remover” sprays often lighten the stain but don’t fix the moisture problem underneath. I see this a lot when customers try to clean surfaces before I arrive. It’s important to document this because the stain may look different than it did initially, and the root cause still needs to be addressed.
Performing your own sampling when it creates a conflict of interest
Sampling can create a conflict of interest if you then want to complete the remediation work. Keeping testing with a third party makes the documentation cleaner, more transparent, and easier for adjusters to review.
Under-explaining the limits of a visual inspection
A visual inspection only covers what you can see and measure without opening walls or removing materials. If parts of a room were blocked, if a ceiling couldn’t be accessed, or if cabinetry prevented a full view, I make sure that’s documented. It protects you later and helps the hygienist understand what might need a closer look.
Not warning customers about disturbing materials
Customers are often tempted to “take a quick peek” behind baseboards or drywall. I always explain why this isn’t safe without containment. Disturbing mold can release spores into clean areas and make the situation worse. Adding a short note about this conversation shows that you clearly communicated the risks and kept the inspection within its proper scope.
When to Use a Mold Inspection Report and When to Start Remediation
A mold inspection report is always the first step. It documents what you saw during a visual walkthrough, the conditions inside the building, and any clues indicating a moisture problem. In many cases, this report is all the customer needs to understand what’s happening and what habits or minor repairs will help.
Where the hygienist fits in
A hygienist performs sampling when necessary and writes the remediation protocol. Their role is important because contractors shouldn’t sample themselves and shouldn’t diagnose species or hidden sources without scientific testing. On larger or higher-risk jobs, the protocol protects you, the homeowner, and the adjuster by clearly outlining the scope of work.
How your inspection supports the remediation
Your inspection report sets the stage for everything that comes next. It helps the hygienist understand what you saw, provides the adjuster with a clear record of the conditions, and helps the homeowner understand why additional steps may be required before cleanup begins.
How DocuSketch Can Simplify the Mold Inspection Process
Eliminates Redundant Photo Work
Each 360° scan generates multiple cubic images, so technicians don’t need to repeat the walkthrough with their phone. I’ve seen this save 15 to 30 minutes per site visit and reduce missed details.
Creates Clear, Room-by-Room Photo Reports
The Generate Report feature produces a PDF with room labels, comment images, and optional floor plans. Adjusters can open it even if they don’t have access to the complete 360° walkthrough of the property.
Learn more:
https://www.docusketch.com/solutions/mold-remediation-software
Supports Hygienists and Adjusters
Hygienists use your documentation to understand what you saw on-site. Adjusters can review clearly labeled photos without asking for more.
Improves Consistency Across Your Team
Label a room once, and every image inherits the label. This keeps documentation consistent even when technicians change.
Makes Ongoing Monitoring Simple
Additional 360° scans create a clear timeline that supports billing, progress tracking, and final documentation.
Start Your Next Mold Inspection With a Clear Plan
A well-structured mold inspection report helps you explain what you saw, what it means, and what needs to happen next. With a consistent template and complete documentation, your inspections become clearer, faster, and more defensible.
Clear documentation makes mold work easier for everyone. If you’d like to see how DocuSketch can help your team capture accurate, room-by-room records in minutes, you can book a demo today.

Related Articles


%20(1).jpg)